Ten ways to do this and five ways to do that, are popular types of posts, and can often be a bit corny, which is one of the reasons why I don’t do these very often, but a number of things have been on my mind recently, so I thought I’d pull these various topics together into a list of “ten ways to improve your photography”.
I’m going to talk about this mostly from a nature or landscape photographers perspective, but much of what I have to say today is relevant for all photographers. There’s all sorts of other stuff that you can do to improve your photography in various areas of course, so think of this as my short list of advice. Here we go…
1 – Get in closer
When we approach a scene, it’s all too easy to be overwhelmed by the entire scene and reach straight for our wide angle lens. Great! If the entire scene is worth capturing, do that! But, bear in mind that quite often, what we are reacting to is not the scene as a whole, but a number of smaller beautiful elements within the scene.
Our brains are amazing machines, that instantly stitch together various elements that make us excited about a location, but when we pull all of these elements into a wide angle photograph, each of them individually gets smaller, and can become relatively insignificant when viewed by others in a single photograph.
If you are able to print that image out large and have people view the details, it may give the viewer the same sense of wonder that you had in the field, so as I say, if it’s a beautiful scene, by all means make your wide angle shot of it, but then reach for a longer lens, and pick out all of the individual elements that you are truly attracted too.
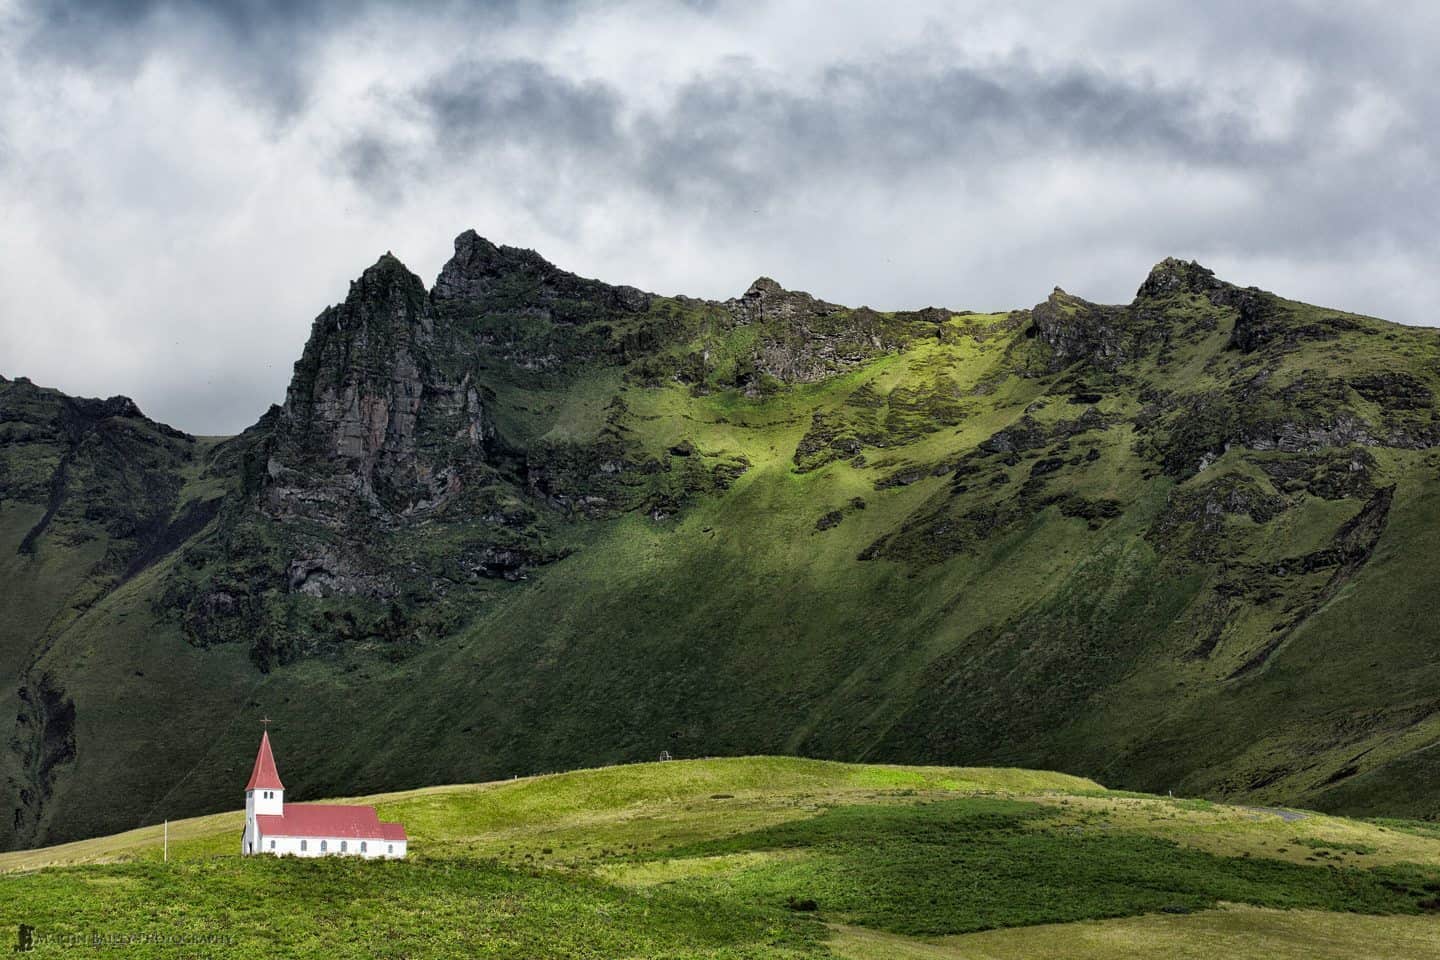
One of the things that I find works for me, is simply taking a moment before I even select a lens, to take the entire scene in. There are parts of the scene that are making you say “wow”. Just ask yourself where these parts of the scene are, and if they would be more powerful brought together in one photograph, or broken out simply depicting each interesting element or fewer elements in multiple photographs.
2 – Simple is Best
When I’m teaching photography in the field, I often find myself saying “If an element doesn’t add something to the image, then it detracts from it.”
You are responsible for everything included in the frame. Before you release the shutter, scan the frame, and ensure that you are only including elements that play a part in your scene, adding to the overall story you want to tell. If any element is not adding to the scene, leaving it in the frame may actually detract from the overall beauty or effectiveness of the final image.
Your options of course are, as in point #1, to get in closer, either by moving closer or selecting a longer lens, zooming in to narrow your frame, enabling you to exclude unwanted elements. Sometimes of course, you will be faced with a decision. You may have an unwanted element that you don’t want in the frame, but a second element nearby that belongs in your photograph. When this is the case you have to consider if moving your own position to the left or right, or getting higher or lower, will enable you to include one element without the other.
If you absolutely cannot frame the scene to eliminate an unwanted element, ask yourself if you are OK with removing it later on the computer? How easy will that be to do?
I love snow scenes, such as the one shown here, because they enable us to reduce a scene down to the bare minimum. With an overcast sky too, we are left with literally only essential elements to make up the photograph. The tree, the fence posts and the subtle line of the top of the hill. Nothing else. (Shot on my Hokkaido Landscape Photograph Tour.)

You may also be able to use a slower shutter speed to de-emphasize unwanted elements too. For example, if you are photographing a street with people walking along it, but you only want the architecture, consider putting on a Neutral Density (ND) filter, and slowing your shutter speed right down. With a multi-second or even multi-minute exposure, anyone that is not standing totally still will simply disappear, but the static buildings will of course stay right where they are.
See my post “All about Neutral Density Filters” for more information on what you’d need and how to use them.
3 – Background is King
Many people, myself included, love to use a large aperture like f/2.8 to get a shallow depth of field, and blur the background and maybe also any foreground objects in a scene, to give our images a beautiful ethereal look. For many people though, too little attention is paid to what is happening in that out of focus bokeh. Without paying attention to where the out of focus patches of color or light in the background fall, you can ruin your image, or at the very least, miss a chance to make a nice photo exceptional.
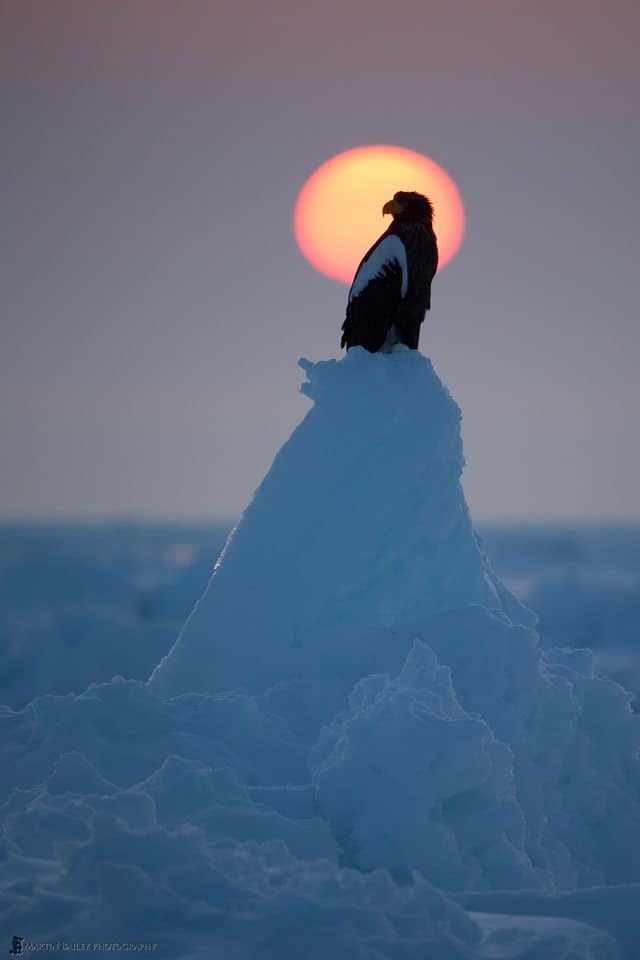
As you line up your shot, look not only at your main subject, but see how the out of focus background is interacting with them. If you have a natural ball of light for example, consider placing that behind your subject, be it a flower or a person, or the sea eagle at sunrise that we see in this photograph (right).
If that doesn’t work for you, take it totally away from them. Having a large ball of light or patch of color half behind your subject can work, but quite often it will just look like sloppy framing, and generally best avoided.
4 – Use Live View When Possible
To help you with some of the compositional advice that we just covered, whenever possible, use Live View on your camera.
Live View doesn’t work well for action shots, which are more easily captured while looking through the viewfinder, but for slower paced shooting like still life or landscapes, it can be a very helpful. The reason it helps, is because Live View condenses the otherwise three dimensional world down to two dimensions, emulating our final photographic image. Electronic viewfinders on many mirrorless cameras do the same thing.
When we look through a physical viewfinder on an SLR or rangefinder camera, we are still looking at a three dimensional world. Although the frame of the viewfinder helps us to a degree, our brain still moves between the various layers of the scene subconsciously, separating them, and making it more difficult of us to identify elements that will look out of place in a two dimensional photograph.
In Live View, pay attention to the flattened layers of your image, and move around to stop elements from stacking up in an awkward way, or to purposefully align background elements to enhance your main subject, as we mentioned earlier. If your camera does not have Live View by the way, do check your images on your LCD before moving on. If something looks out of place, fix it.
5 – Take Control of Your Exposure
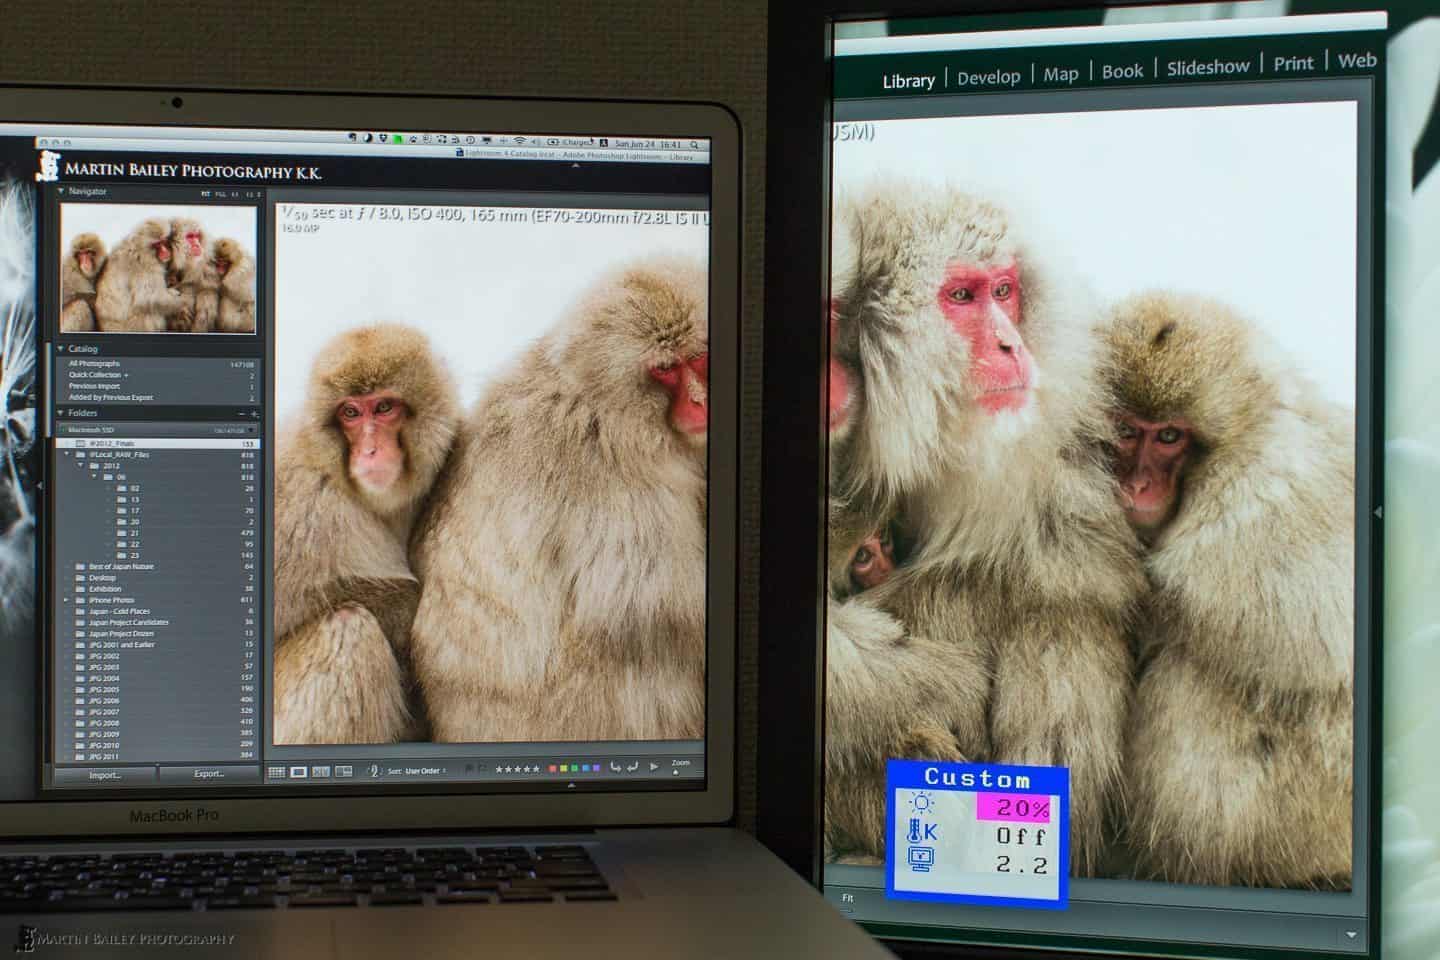
There is a global conspiracy between the camera manufacturers and display manufacturers, that is designed to make us mediocre, if we aren’t careful. The problem starts with cameras being designed to automatically set exposure in a very safe way. If you don’t help your camera in any way, the image will be recorded with all of the information in the middle of the histogram, which means that it is actually quite dark.
The problem isn’t always obvious though, because straight out of the factory, our computer displays are usually set by default to be very, very bright. Some set at around 80% or even 100% brightness. Then, when we look at the dark photos from our cameras that are shooting an average, safe exposure, they look great, because the display is brightening them up so much.
You might think that this is fine, because it all sorts itself out, but there are two main reasons why you should not be satisfied with this situation. The first reason, is because the printer manufacturers aren’t in on the conspiracy. If you shoot a dark image, and think it’s OK because your display is too bright, when you print it, it will be way too dark. This is one of the biggest complaints that I hear from people that start to print their images for the first time, and it also effects people that send their images to third party printers to be printed. Although most of the time, third party printers will brighten up images before printing, again, helping to keep the conspiracy a secret.
If you never print your images, you may still think you are off the hook, but that may not be the case. The other issue with trusting the camera’s meter, is that it introduces unnecessary noise to your photographs. The lighter your photographs are, the less noisy they will be. Even if you decide to darken down the image again on your computer to regain a certain mood for example, you will record better quality images by exposing them so that the information is almost touching the right side of your histogram.
This might be quite difficult to understand, but the histogram maps out the amount of data being recorded in our image from the darkest to the lightest information. The darkest image data is on the far left, and the brightest image data is on the far right. The way images are recorded means that there is a higher signal to noise ratio in the bright parts of our images, and noise increases in the darker areas.
If your image is recorded as the camera would recommend, with all the data in the middle of the histogram, you will see more noise across the image, and your shadows will be very noisy indeed, and in fact my be so dark that there is no information recorded in the shadows at all.
By increasing your exposure until the brightest part of your scene is just about touching the right side of the histogram, you will have much cleaner image data, and quite often your shadow areas will not to very noisy either, because you’ve moved them away from the far left of the histogram, where all the really nasty noise lives.
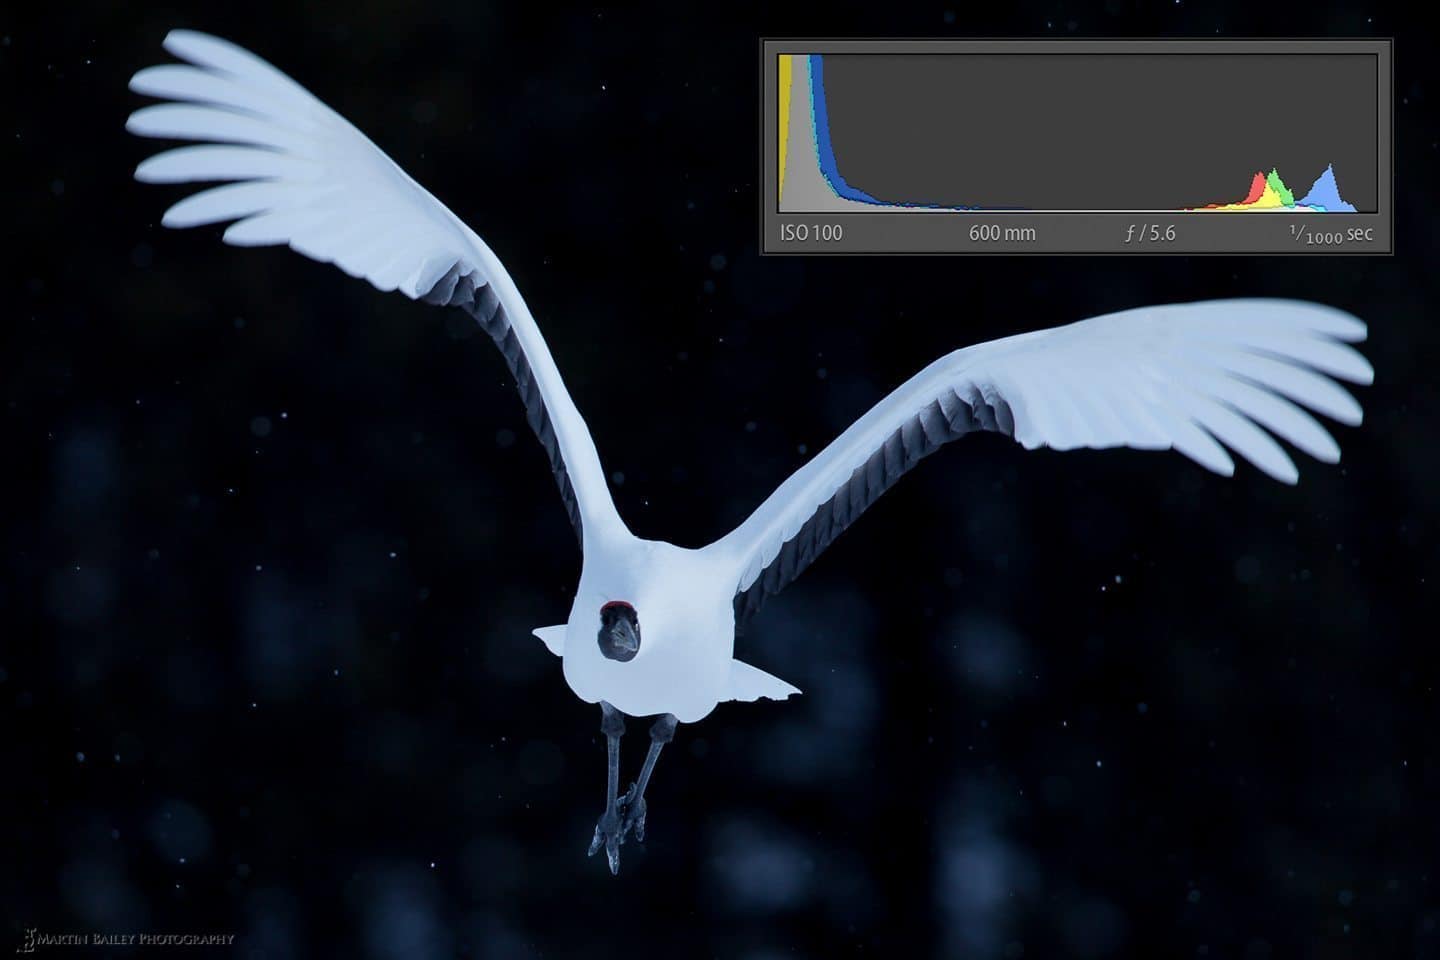
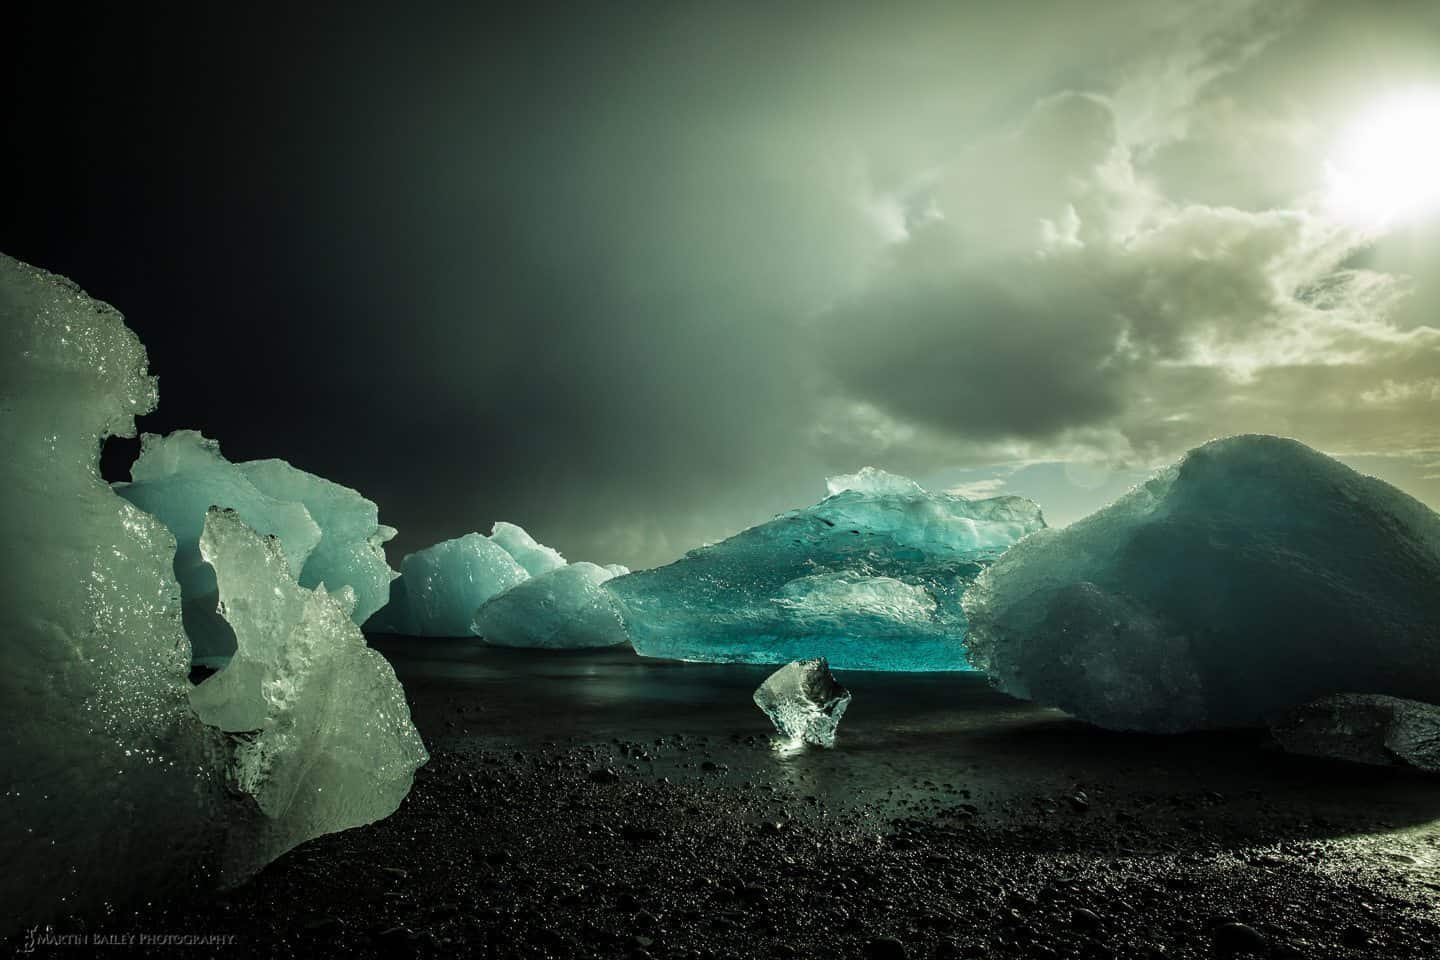
Even if your shadow data does end up on the far left, there’s a good chance that it won’t be totally black, and although it may be a little noisy, there’s be enough texture and detail that it doesn’t become much of a problem. There are times of course, when an almost totally black background is quite effective and therefore desirable, as I found with this image, shown here with its histogram for reference (below).
To increase your exposure, you can use Exposure Compensation, and keep increasing the exposure until your image data is close to the right side of the histogram, but then as you reframe or your subjects move, the amount of Exposure Compensation required can fluctuate, and you might start to over-expose images if you don’t stay on top of this.
Depending on where you are in your photography, this can be a very daunting prospect, but to really control and understand your exposure, I urge you to try shooting in Manual mode. It sounds like more work to set your exposure yourself, but it actually frees you from the need to constantly adjust Exposure Compensation, especially when working in similar lighting conditions.
To start with, you might try finding your exposure in Aperture or Shutter Priority modes, then memorise the settings, and switch to Manual, then dial in those settings. Note though, that even if you go straight to Manual mode, you are not flying blind. The exposure meter still works, and you can see where the camera thinks the exposure should be in the viewfinder, so you use this as a guide.
As you frame up your scene and start to adjust your exposure, take a guess at where it should be. If there is a lot of white in your scene for example, you may need to adjust so that the exposure meter shows exposure at +2 stops. Or if there is say half of your scene that is very light color, and half very dark, you may need to have the caret on the exposure meter at zero. Once you’ve adjusted your exposure, shoot a test frame and check that, or check your exposure in Live View before shooting, and then do any fine tuning necessary before you start shooting for real. Once set up though, you may find that you don’t have to change your exposure again, until you move to a new location.
Sure, you do have to stay on top of Manual exposure, and for some types of photography, it can be too much to deal with, but as you become good at adjusting your exposure, it is easier than using Exposure Compensation, and you can keep your image data over on the right side of the histogram much more easily.
This results in you creating beautiful bright images with much less or even no noise at all. To close the loop on the conspiracy theory though, note that you now have to darken your display down so that you see your images as they really are now. Because your images are now much brighter, they’ll look normal when your display is darker. If you calibrate your display, you can often have the software help you to set the brightness to the necessary level for viewing in your ambient lighting conditions. You might find your display being set as low at 10% to 30% of it’s full brightness.
Because you are now shooting bright images, and viewing them at the correct brightness, an added benefit is that they will now come out of your printer looking beautifully bright, as you expected them to be, and that’s a nice added bonus.
6 – Use the RGB Histogram
The histogram is one of the most useful tools on our cameras, but its usefulness is cut in half by the manufacturers setting them to a Brightness display by default. If you are using a Brightness histogram, which is just a white graph on a black background, or something similar, you have no idea how each individual color channel is being recorded.
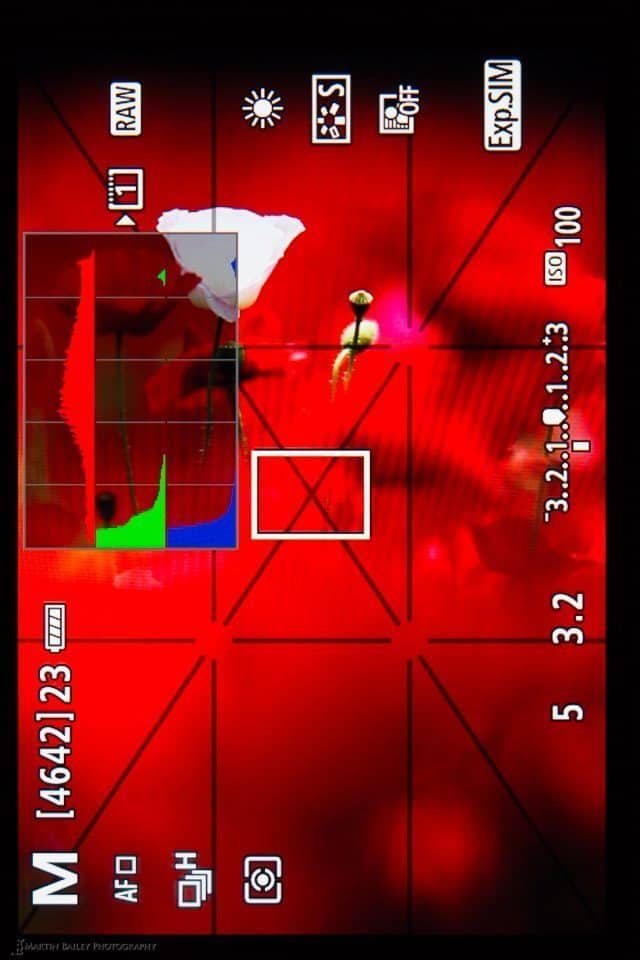
Keeping in mind that most cameras record images in RGB color, the Brightness histogram is simply an average of the three colors, Red, Green and Blue. Using a scale of 1 to 10 to explain this, image you have a field of red flowers, that you want to expose nice and brightly, at 10, which represents the right side of the histogram, but there is very little green or blue in the scene. Let’s say there’s just 1 part green and 1 part blue to the 10 parts red. The total is 12, and this is then divided by 3 to get the average brightness of the three colors, so the Brightness histogram of our field of red flowers would show most of the information in the lowest quarter of the histogram, despite the red actually being very close to the right side.
You can see this at work in this photograph (below). This is actually a photograph of the back of my camera, while framing up another photograph on my computer screen, so there’s some weirdness going on in the photo, which you need to ignore. You can clearly see though, that the Brightness histogram would have us believe that the scene is much darker than it really is, because it’s an average of the Red, Green and Blue channels.
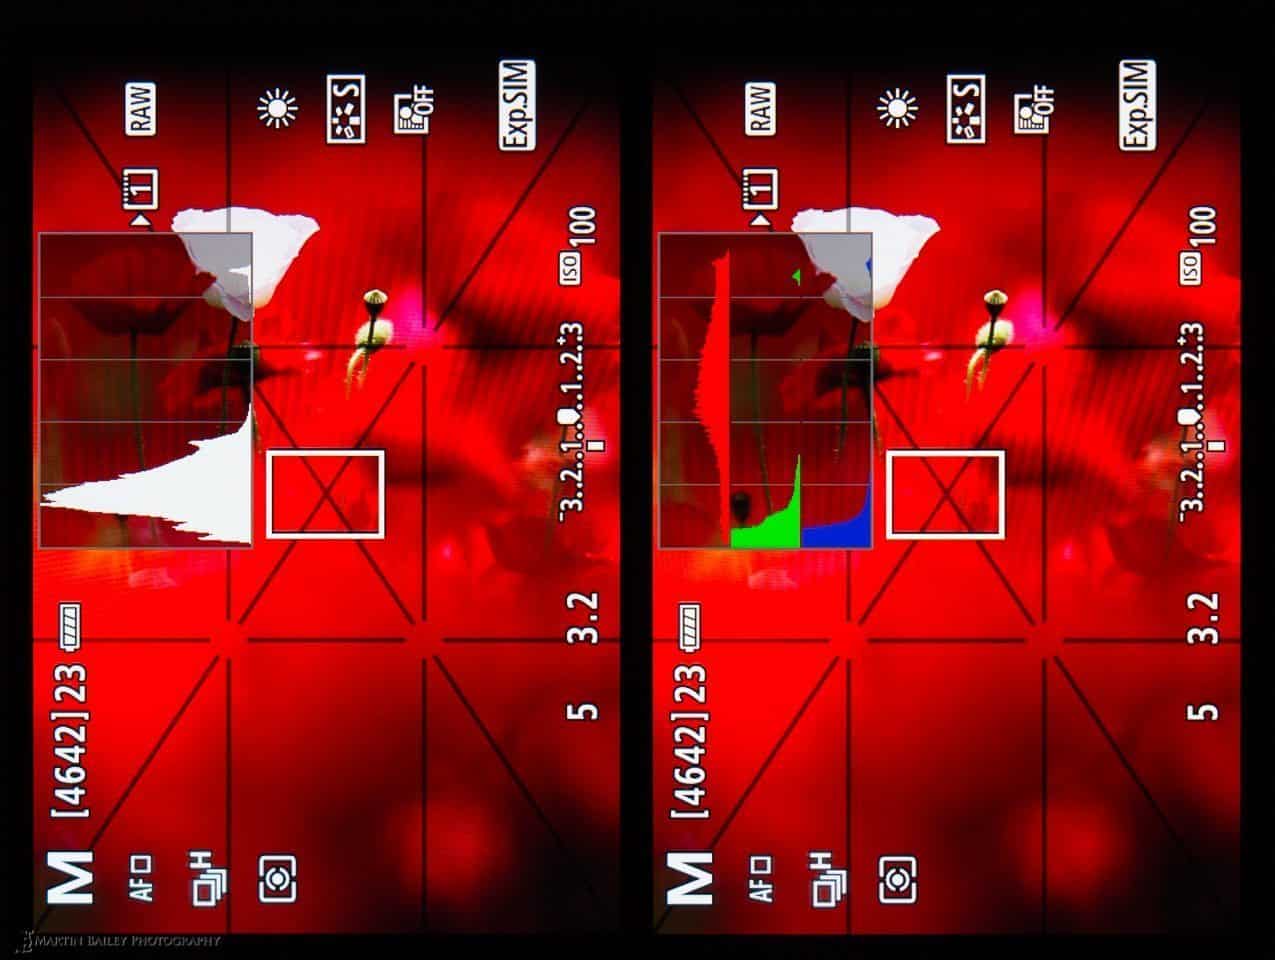
If you have taken control of your exposure, and perhaps Exposing to the Right (ETTR) as we mentioned in the last point, this will obviously cause problems, because you can’t actually tell how bright each color in your scene really is. To avoid this, select the RGB histogram on your camera. This will show you each color channel separately, so that you don’t inadvertently over expose any individual colors.
Unfortunately, most cameras are not only fooling us, they actually fool themselves by setting their average exposure based on the total brightness of the scene, rather than looking at individual color data, which is why you can sometimes end up with blotchy colors in scenes like where one color is prominent over the others. The camera basically overexposes the prominent color to give us a average brightness image. Another great reason for using the RGB histogram and taking control of your exposure.
7 – Constantly Question Yourself
In Craft & Vision’s PHOTOGRAPH magazine Issue #5 I published an article called “The Mental Checklist”. In this I discuss how in the early years of doing this podcast, I started to ask myself questions constantly as I worked in the field. I would find myself starting to explain the steps that I was going through towards making my photographs, as though I was explaining it to you, the podcast listener or reader, in a future episode.
The cool thing is, that the very act of questioning each step in my process, led me to identify mistakes before I made them. It didn’t take long for me to realize, that this was actually helping me to improve my photography. The even cooler thing is that you don’t actually have to be making a podcast to do this yourself.
Just ask yourself questions as you work. As you approach a scene, ask yourself where you should stand or set up your tripod. Do you need to photograph the wide seen first, or are the details what are really capturing your attention? If so, reach for your longer lens. Do you want a fast shutter speed, or slow one. If slow is better, do you need to fit an ND filter? Will a polarizer filter help you to reduce reflections or intensify color saturation?
You might ask yourself if this is the right time to even be shooting the scene or subject? Will it help to just be patient and wait for the light to improve, or would it be better to come back at a different time of day? Is there a soda can in the scene that you could remove to save yourself from removing it later in post?
Once you’ve made your exposure, check the image and ask more questions. Did you get the background right? Is there a post sticking out of your subject’s head? How is the exposure? Rinse and repeat!
The more you shoot, the more questions you will ask yourself, but as you become more experienced, many of the habits that you form will become automatic, and fade into the background. There should never come a point though where you stop asking questions. Keep asking yourself why you are doing this or why you aren’t doing that, what if you do something totally different entirely? This is the key to refining and improving your processes, and ultimately to improving your photographs.
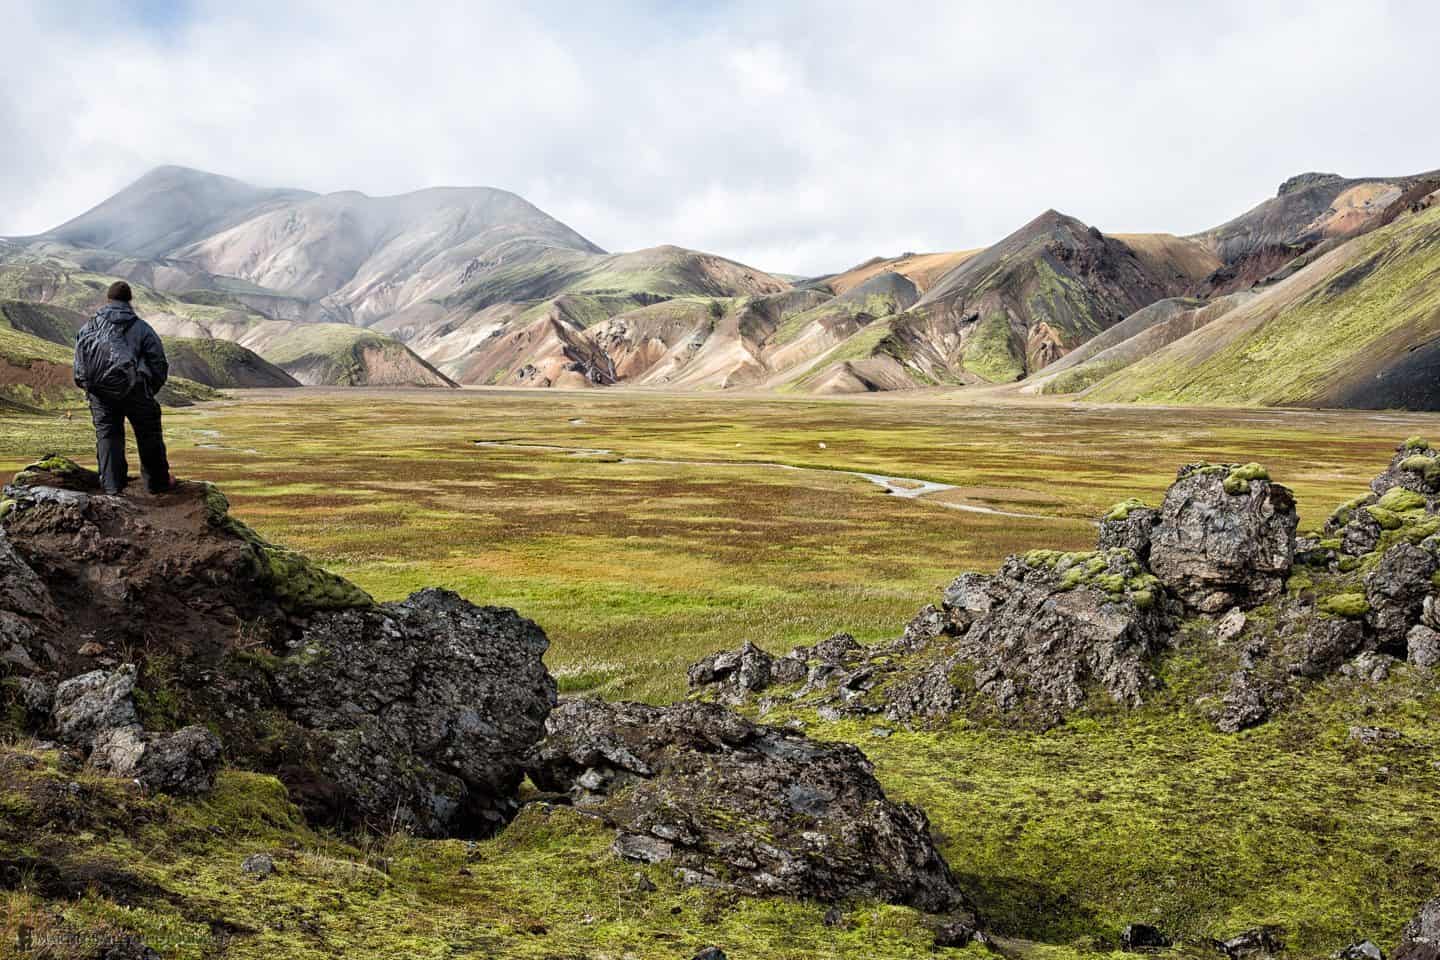
8 – Be Patient
My company motto is “Let’s not rush to ‘arrive’. It’s all about the journey.”
This is in some ways, a play on words, as a large part of my business is based on our tours & workshops, when we literally are enjoying each step of a journey, often in some of the most scenically beautiful locations on the planet.
The other part of this though, is that people seem to be very impatient these days. The Internet culture of having every at our fingertips is making people impatient. Everyone wants to ‘arrive’. To make it big, or to become a great photographer, but many people are looking for shortcuts.
Some incredibly talented people find them, and more power to them, but for the vast majority of us, the only way to get good at something, is to do it, year in year out, until we really make it our own, and then we have to keep doing it to stay on top of our game, and hopefully continue to improve.
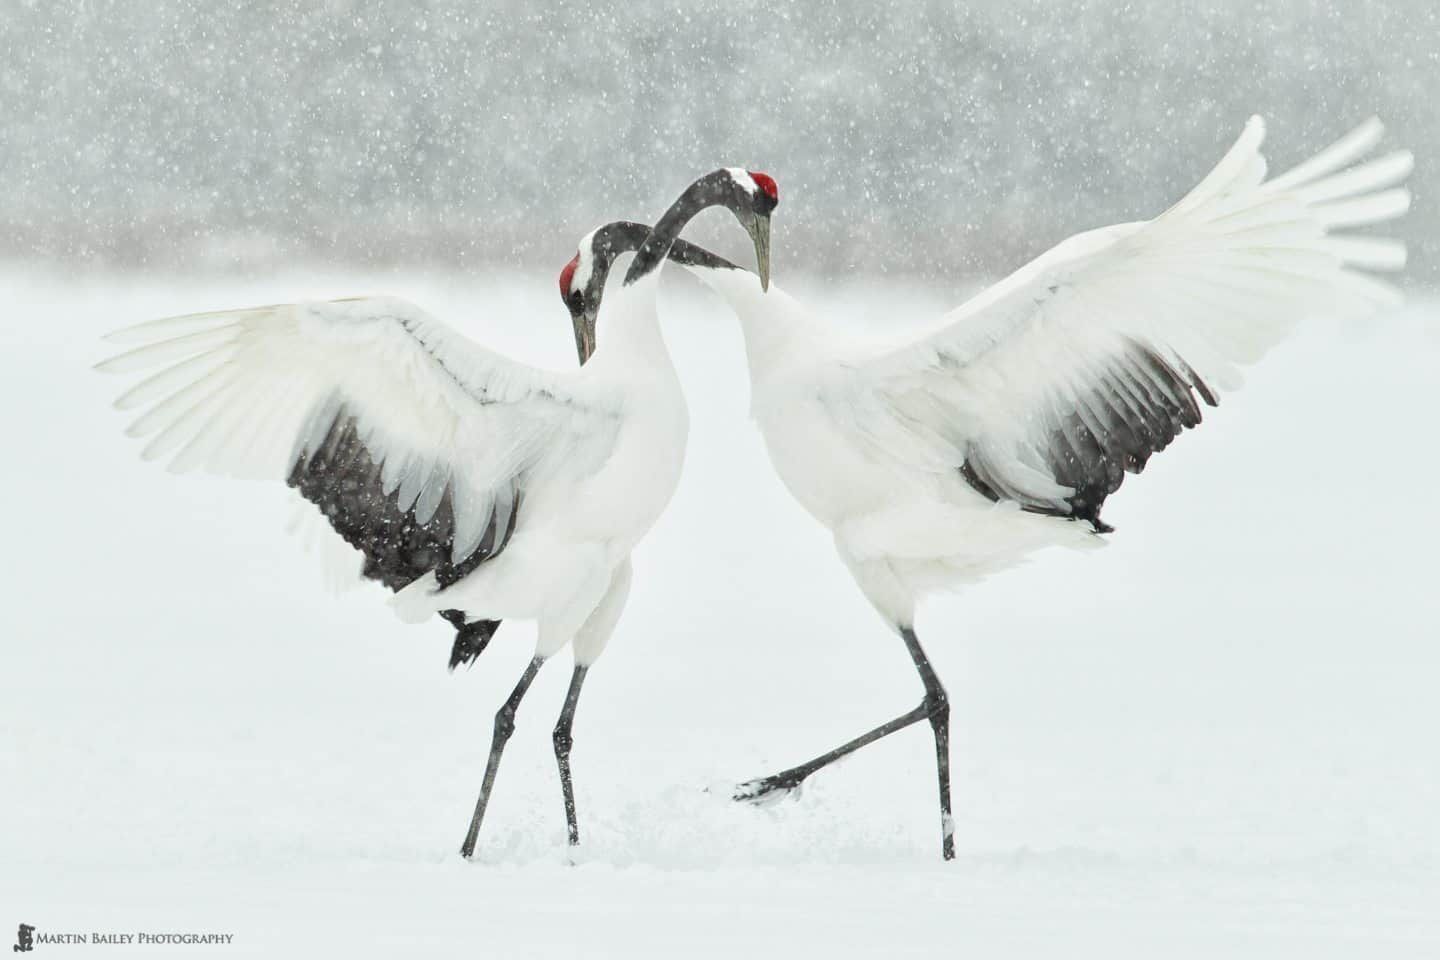
Another part to this of course, is having patience in the field. Sometimes when we arrive at a place, especially where nature or wildlife is concerned, we don’t get our dream shot straight away. In fact, if your dream shot is ambitious, the chances are you won’t get that dream shot on your first visit, or your second, or maybe for many years.
I had been traveling to Hokkaido to photograph the red-crowned cranes for eight years before I was able to bag what I considered my dream shot. It was a beautiful moment, and I still love the photograph. But guess what? I’m now looking to shoot something better. Each year I travel there with my Japan winter wildlife tour participants, but in all honesty, if I wasn’t doing the tours, I’d go each year anyway. The locations we visit are magical. I don’t call them the Winter Wonderland Tours for nothing. 🙂
I’m not saying though, that you should not try to get your dream shot every time you pick up the camera. Within the bounds of a single shoot, just being patient. Giving yourself a chance to get some great shots is still vitally important. It doesn’t matter whether your are close to home or on the other side of the planet. If you’ve invested time in getting to a location to make photos, give yourself a chance to make the best that you can.
9 – Don’t Over-Research – Learn How to Solve Problems Yourself
The Internet may be making people impatient, but it can of course be an amazing tool, that I believe we are very fortunate to now have at our fingertips. We live in an amazing age! But, I am starting to see more and more information junkies, paralyzed by information overload.
Of course, it’s perfectly OK to read up on things that you are interested in. Assimilate as much as you can as time allows, and if you simply like reading, maybe the Internet has replaced books or magazines to a degree. That’s fine! But please don’t be fooled into thinking that rampantly reading every single photography related article that you can find is going to make you a great photographer.
It helps, of course. Learn what you can, but I’m coming across more and more people that have read so much about the technical side of photography, that they start to get confused. There’s so much information swimming around in their heads that when it comes to actually using some of that information, they can’t figure out which technique to use. Overthinking a situation can be as paralyzing as not having a clue as to what you need to do in the first place.
It’s much better to develop problem solving skills to overcome hurdles or figure out problems by ourselves. You’ll draw from all of the information that you have already made your own, but your work will be much more original and you’ll be more likely to think your way around the next problem if you practice thinking for yourself instead and spending all of your time online trying to assimilate the entire accumulated knowledge of the Internet.
This probably sounds contradictory coming from some that’s writing on a blog that I would like you to visit and read, or listen to the Podcast, but I’d really like to think that you will value what I have to say enough to keep me on your reading list. I’m not saying that you should stop reading blogs and Web pages altogether, but I do urge you to ask yourself if you are spending so much time online that you are reducing the amount of time that you could be out in the field with your camera. If the answer to this is yes, then it’s probably time to cut back a little.
One other part of researching that I think should be avoided more is looking at too many photos of locations that you intend to visit before you actually go. Looking at photos is a great way to find locations that you’d like to visit, but once you have that location on your list, don’t go too crazy looking at more work from there.
If you turn up at a location with too many image implanted in your head, you’ll spend your whole time looking for those images, and stop being open to your own creativity. You have to give your own photography room to breath, and there’s no room for that if you head is full of other peoples’ images.
Turn up knowing what a location can offer, and research the best times of day or time of the year to be there, but then let your own creativity take over, and see if you can’t make something better than has already been made there, not just come home with your own copy of someone else’s photograph.
10 – Don’t be a Fair Weather Photographer
One of the things that I feel places unnecessary restrictions and even holds back many photographers is the belief that it needs to be a sunny day before you can make any good photographs. This could not be further from the truth.
I cringe whenever I hear from someone returning from a trip complaining that it rained the entire time. Rain can be a pain to work with. You need to ensure that you not only have weatherproof gear, or protection to keep your gear working in the rain, but you also need to ensure that you wear the right clothing to keep yourself safe and dry when the weather turns foul.
But a sky full of rain or storm clouds can provide you with much better photographs than a blue sky, even if you have some nice fluffy clouds to break it up. Colors are also more “saturated” when wet. This isn’t necessarily a pun either. There’s a reason why we call rich, deep colors saturated. The contrast in our scene is often lower too when it’s overcast or raining, so we don’t have to compensate for a bright sky by underexposing foliage for example.
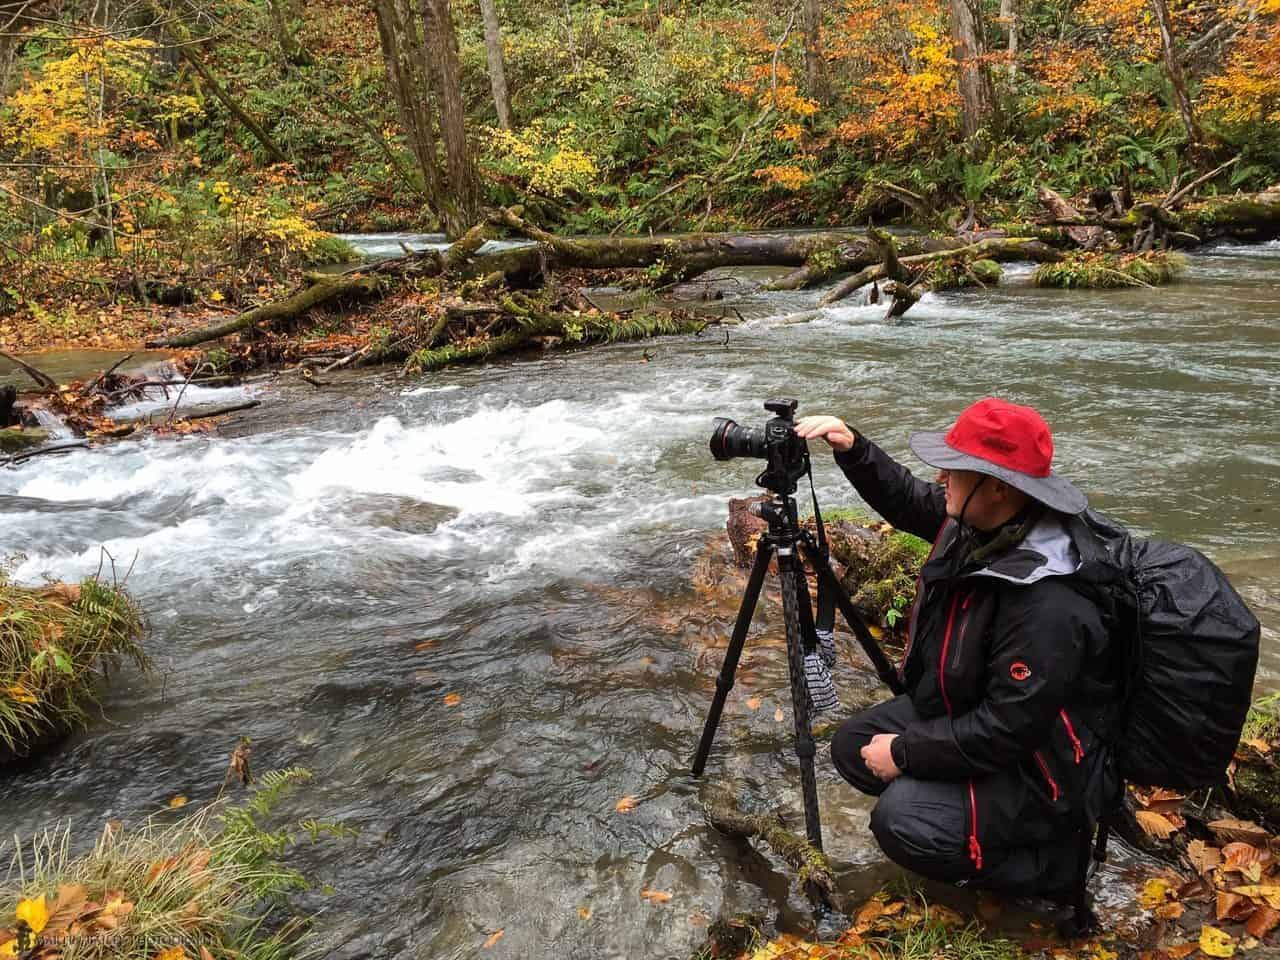
So, the next time you have some free time, and you are hoping for a nice sunny day, think again. You might be passing up an opportunity to shoot some beautiful dramatic images if you decide to curl up with your iPad instead of going outside when the forecast is for overcast, rain or snow.
OK, that’s it for today. As I said in the introduction, this is not an exhaustive list. There’s lots of other stuff that could have included here, but these are the things that I’ve been thinking about recently, and I hope that it is of some use to you.
Show Notes
Hokkaido Winter Landscape Photography Adventure (Tour): https://mbp.ac/hlpa
All current Tours & Workshops: https://mbp.ac/workshops
Subscribe in iTunes for Enhanced Podcasts delivered automatically to your computer.
Download this Podcast in MP3 format (Audio Only).
Download this Podcast in Enhanced Podcast M4A format. This requires Apple iTunes or Quicktime to view/listen.

Very nice article, I think in today’s fast paced world we all tend to want instant gratification from our work. The things you mention on your list really help make you a better photographer. I had a chance (by luck) to work with a gentlemen many years ago that was a seasoned nature photographer. We became friends and he told me many stories of places that photographers visited and he would just set back and watch each one rushing around looking for that perfect shot. He had an image in a stream with colorful leaves, rocks with flowing water cooming over the rocks. This was a very small slice of the river and it was just stunning.
He told me it was a rainy day and other photographers were leaving and as he was just trying to absorb the beauty of this sence. As he took his time, relaxed and started looking around he looked down an noticed this little waterful running over the rock with the fall leaves. The best advice he gave me was simular to some of your top ten.
Thank You for putting together some great podcast, I have trimmed down my internet reading as you said it can be information overload but I really enjoy yours.
Thanks for recounting that wonderful story Mark, and for giving me a little of your precious Internet reading time. I’m very happy that you do. 🙂
Hello, I’m an Englishman and I live with my family next to the Tanzawa mountains. I love photographing the Japanese countryside, and I always enjoy your detailed blog posts! Many thanks!
Thanks very much Tom!
My wife and I have hiked in the Tanzawa mountains, many years ago now. I can understand why you like it. 🙂
Hi Martin. Thanks for a great episode! I listen every week but I particularly enjoyed this week’s episode, lots of practical advice which I’ll try to put into practice on my next photography trip.
One question: you mention electronic viewfinders being preferable to physical viewfinders in that they condense the world to a 2D view, making it easier to evaluate composition and elements in a scene when shooting. I was wondering whether you think this is an advantage of micro four-thirds cameras over DSLRs? Personally I am not a fan of shooting handheld with Live View – I like to look through the viewfinder – but with micro four thirds you could both do this and have the flattened view. Any thoughts? Conversely what do you think are the advantages of a physical viewfinder, if any?
Best wishes,
Steve
Thanks Steve!
I think for steady paced shooting, for the reasons mentioned above, yes, the electronic viewfinder is an advantage of micro four thirds cameras. You have focus peaking and an in-screen histogram etc. Everything is right there!
I maybe should have pointed this out, but I do not recommend DSLR Live View handheld at all. When I say steady paced, still life or landscape, I pretty much by default am talking about working from a tripod. 🙂
The advantages of a physical viewfinder is pretty obvious for fast paced shooting. Electronic viewfinders work well until you try to pan with a bird in flight etc. then it starts to get pretty gnarly. They’re getting betting every year, and if that’s all you use, people seem to get used to it to a degree, but people that come on my wildlife workshops with electronic viewfinders still seem to have a very hard time with them. Landscape is different. They work great then!
Martin, I really enjoyed your 10 Ways to Improve your Photography podcast and this blog post. Some great ideas. The practical information on using live view and also the comparison of the black and white histogram versus the RGB histogram really helped me connect some dots today since you explain it so well. Thank you.
That’s great to hear Geoff! Thanks for lending me your eyes and ears, and for taking the time to comment. I really appreciate it!
Great listen today! And I just found everything on your blog as well, so I’ve added it to my Feedly. Thanks for being an incredible resource Martin, I just started listening a few weeks ago, but your format and content was immensely helpful from the very first episode, thanks again!
That’s great to hear Tim. Thanks for stopping by, and for lending me your eyes and ears!
Martin – I really enjoyed this podcast episode. I listened to it last week before heading over to Iceland. During my trip I worked really hard to get myself to shoot more in manual instead of Aperture Priority and adjusting the exposure compensation. I also started using the RGB histogram to maximize the quality of the data gathered in the shot. I typically don’t use the histogram a lot and never the RGB version of it. I got home last night and transferred the images to my computer and did a quick scan of my images. My initial impression was that the quality and tones straight out of the camera seem cleaner. I’m looking forward to really getting into the images to edit them and see the results.
Thanks again for the wonderful tips.
That’s great to hear Nick! I’m pleased you found this useful, and thanks for the update!
I wanted to follow up. I posted the first set of images from the trip where I used the histogram to maximize the data. I was really impressed with additional level of detail I was able to pull out during the editing process. I’m very glad I committed to working on this. Thank you again for the tip!
The images are posted here if you care to take a peak: http://nicknieto.com/blog/photos/travel/iceland-svortuloft-lighthouse/
Nicely done Nick! Beautiful work. I can’t wait to get back there in a few months time now!
Thanks for sharing!
Your tutorials are awesome, thank you 🙂