Having just completed my Namibia tour, today we start a series of travelogue style podcasts to walk you through our adventures as we circumnavigated this beautiful country.
The Complete Namibia Tour starts with landscape photography, then we do a bit of cultural photography as we photograph the Himba people, then we finish with wildlife, as we move on to the Etosha National Park.
Editing Namibia
I shot a total of 5700 images, with just over 1,200 of these from the first 7 days during which we focus on landscape work. I shot 640 during the two days that we photographed the Himba people, and the remaining 3860 images were from the last four days of wildlife work. With our first day in Etosha resulting in almost 2,000 of those images.
I arrived home late on Tuesday evening last week, and I had a ton of work to catch up on, so I wasn’t able to release a podcast last week as I’d hoped. In fact, it took me until yesterday to just complete my first pass through my images marking everything that I wanted to look at again with 3 stars.
To make it easier to whittle down my selection, since I started using Capture One Pro a year ago, I create a Smart Album that automatically picks up 3-star images from all days of the tour. When I finished my pass through the final day of the tour, I had 1,128 three-star images. That means I’d selected one in five of my images, or twenty percent, and that’s quite high, especially when shooting wildlife, so that’s a tribute to how productive the trip had been.
I spent the rest of Sunday editing down my selection while tweaking the look of the images a little as well, but by the end of the day I still had 1,028 images in my selection, so I moved on to selecting the first ten that I will talk about today. I’ll finalize my selection over the coming week.
The Quiver Tree Forest
After the first night in Windhoek, the capital of Namibia, when the group of 10 participants for this tour began to get acquainted, although eight of them were people that I’d traveled with before, we drove until shortly before sundown to our first location, which is the Quiver Tree Forest near the town of Keetmanshoop. We arrived in time to shoot a few images of the Quiver Trees with the warm light before sunset hitting their trunks, giving them a shine like real gold. I won’t share a photo of this here because they aren’t really anything special.
For me, the magic starts at the Quiver Tree Forest after the sun has gone down. The first part of this is the warm glow on the horizon after sunset, which makes a beautiful backdrop for the trees silhouetted against the red to blue gradation sky, as you can see in this first image for today (below).
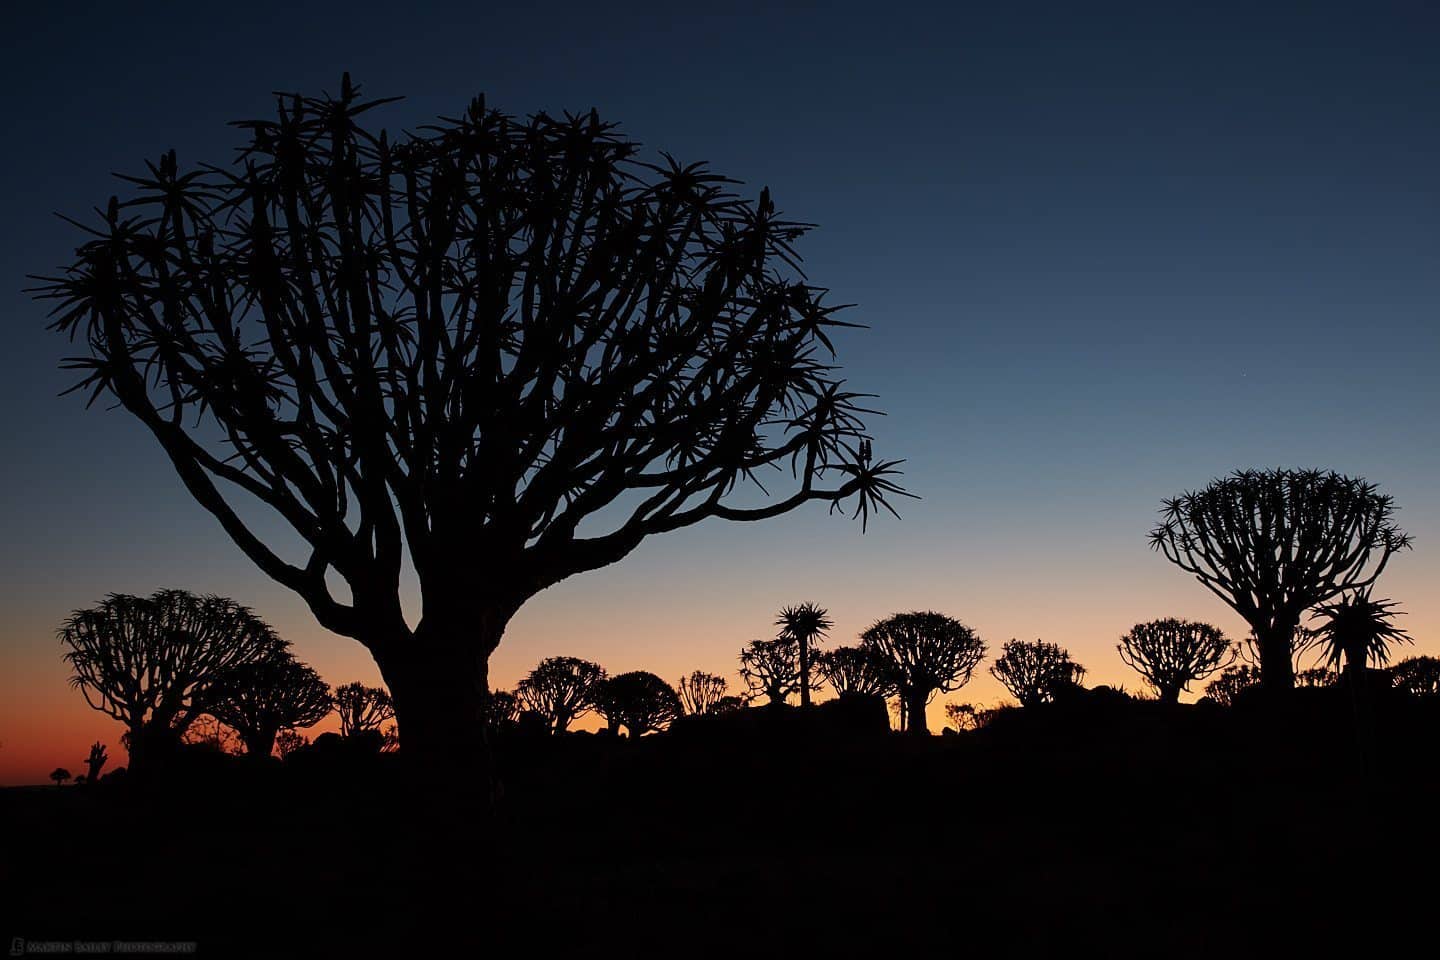
Dusk Quiver Trees
As I look for a composition in the Quiver Tree Forest, I’m looking for a number of things. The first, of course, is a nicely shaped tree to become my primary subject. Then I start looking for secondary subject trees, that I can also place in pleasing spots around the frame. I can’t move the trees of course, but by changing my position I can alter the relationship between the trees.
As I do this, the third thing that I’m highly conscious of is the separation between the trees. Ideally, I like to get separation down to the base of the trunk of my main tree, but that wasn’t possible with this composition, although I did shorten my tripod legs to get the camera low enough to get good separation between the trees branches and the distant trees. I was also consciously ensuring that I had space either side of the main trees on each side of the frame.
My settings for this image were ISO 100 at f/14 for a 6 sec exposure. I was using my Canon 24-105mm Mark II lens.
Milky Way
The moon was going to be out in the evening while we were at this location, so we didn’t go back to do some astrophotography until 4 am the following morning when there’d be an hour or so after the moon had set before Astronomical Twilight kicked in.
Astronomical Twilight is when there is enough light in the sky to stop you from being able to see the stars so well. Up to that point, the sky is basically black, which enabled us to make photographs like this one of the Milky Way behind a silhouetted Quiver Tree (below).
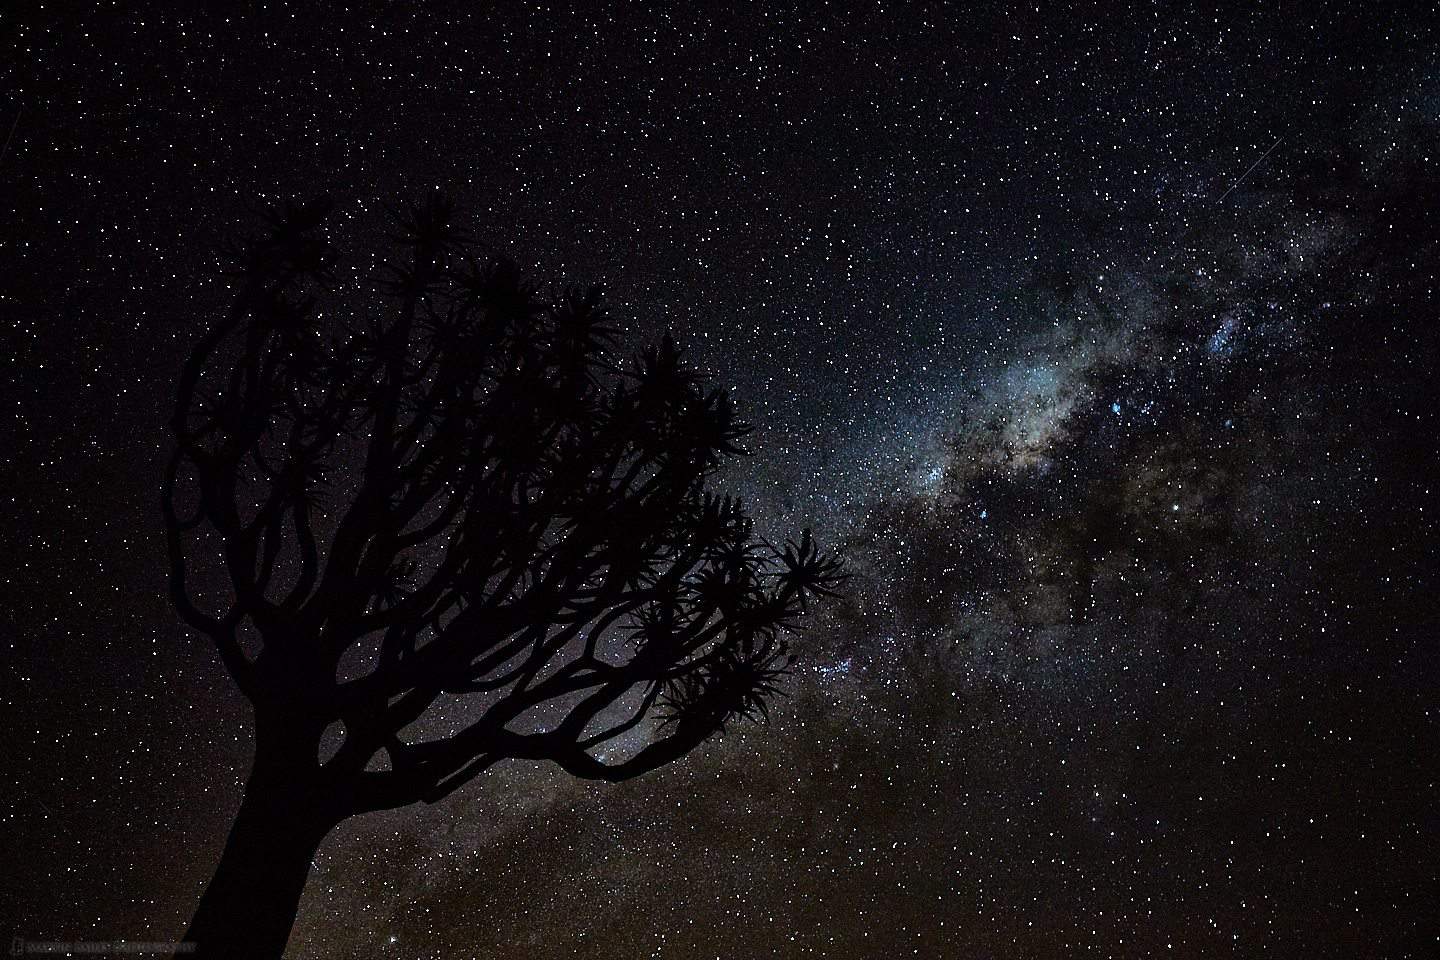
Quiver Tree and Milky Way
I really enjoyed this hour of shooting, as me and my group were the only people in the forest, and everyone was calling out to each other to time their light-painting to avoid ruining each others’ shots. I too did some light painting, but I’m not a huge fan of the results. In trying to keep the number of images I show to a minimum, I have left out some of the wider shots as well, with more trees along the bottom, as I really like this look, with the one tree almost like a stencil, cutting out its own shape from the star-filled sky.
I was using my Canon 11-24mm lens, mostly very wide, but I zoomed to 24mm to enlarge the tree and Milky Way for a few last frames, of which this is one. I processed the image in Capture One Pro, adjusting the white balance slightly, and increased the contrast to 10 and saturation to 15, and with a Luma Curve, I darkened the black of the sky slightly, while increasing the brightness of the mid-tones, making the Milky Way a little brighter. I also increased the Clarity and used an Adjustment Brush to brush in more Clarity just over the Milky Way to make it pop a little more.
My settings were ISO 3200 at f/4 for 20 seconds. This is pretty much my standard setting for shooting the Milky Way. If you use an f/2.8 lens, you can go with an ISO of 1600 instead, for similar results. The important thing is to focus the lens correctly before shooting, rather than simply cranking it around as far as it will go, as this will usually take the focus past infinity. I manually adjust the lens to the line marking Infinity, then zoom in and check that the stars are sharp in a test shot, before proceeding to shoot. As you can’t really see to frame your image, you generally need to do a few test shots anyway to get your composition right.
Giant’s Playground
After photographing the Milky Way for an hour, we drove down the road a little way to photograph the Giant’s Playground as the warmth of the sun started to illuminate the horizon, as you can see in this photo (below). I shot this shortly before six o’clock, and if I recall, the sun was going to rise at around 6:25, about thirty minutes later, so this is a beautiful time of day for this kind of photography.

Giant’s Playground at Dawn
Like the first image that we looked at today, the smooth gradation from deep orange to blue is something that really appeals to me. I’m not much of a sunrise person, in as much as I really don’t find images of the sun’s disk that appealing, but this thirty minutes earlier light is pretty special if you have something like these rock formations in the foreground to add interest.
You might notice a little bit of digitization or steps in the gradation of this image on the web sized photograph because I compress these images quite aggressively on the Website for SEO purposes. Try clicking on the image to see the larger version which may be better, but if not, you’ll just have to trust me that the original is totally smooth. My settings were f/14 for 3.2 sec at ISO 100.
Kolmanskop
We went back to our lodge for breakfast after this, then drove over to the coast and the town of Lüderitz, where we’d spend the next two nights, giving us access to the deserted diamond mine community at Kolmanskop and the deserted part of the active mine at Elizabeth Bay. We’ll move on to Elizabeth Bay images next week, but for today, we’ll concentrate on my Kolmanskop work from the afternoon of day two and morning of day three.
There is actually currently a bit of controversy in Namibia over a proposed change of the town name Lüderitz to its original name with the beautiful Nama language clicks. The proposed new name is, as far as I can remember, pronounced !Namiǂnüs, where the exclamation mark is one kind of click, and the equals symbol with a vertical bar through it, is an IPA (International Phonetic Alphabet) symbol for a palatal or alveolar click. I know I’m probably butchering this pronunciation, but that’s the best I can do.
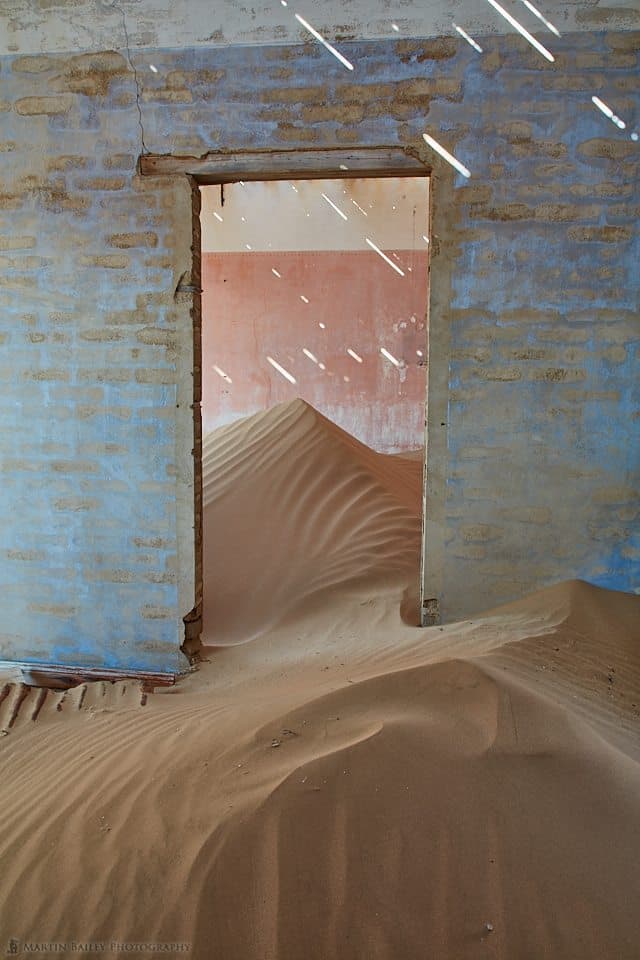
So, as I mentioned, Lüderitz or !Namiǂnüs is our base to get to the deserted diamond town of Kolmanskop, which to me is mostly about the sand inside the deserted houses. In this first image (below) you can see that the sand in this building has reached the light switch. I love to find buildings where the doors can be lined up like this, giving a greater sense of how the sand is reclaiming these buildings.
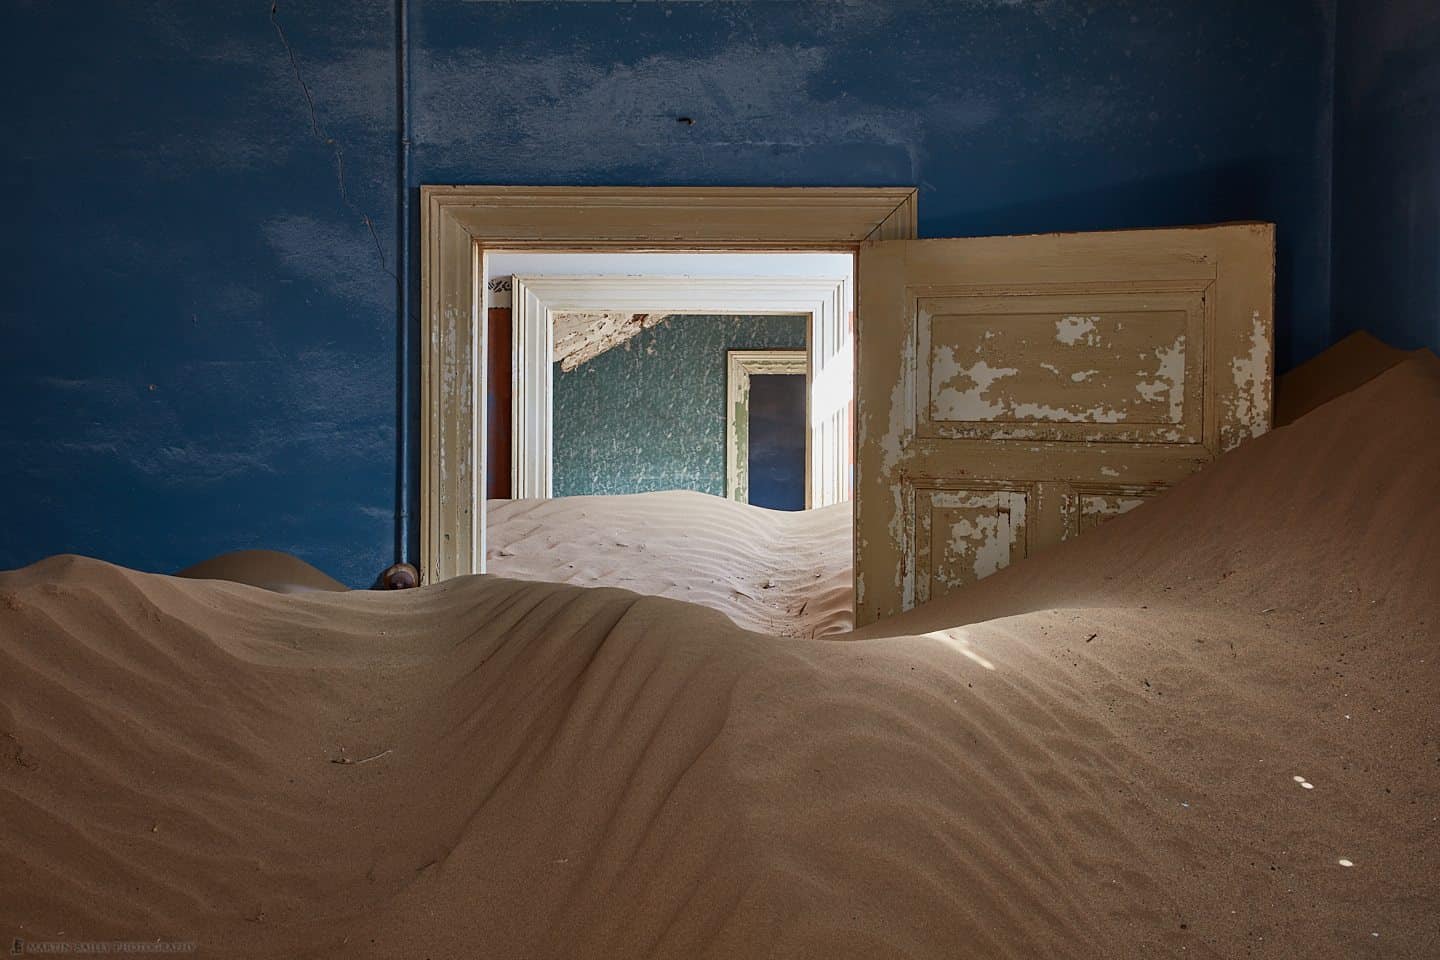
Kolmanskop Doors
As it was the afternoon, there are some patches where the bright sunlight is catching the sand and the door frames, and I generally try to expose my images so that this is just blowing out slightly, and then I bring that back under control in Capture One Pro. I especially like this room because the blue and the color of the sand are complimentary colors, and we can see splashes of color on three more walls as the eye moves through each of the rooms visible. My settings for this image were f/14 for 0.5 sec at ISO 100.

Light Rays
I owe this next shot to my friend Jeremy Woodhouse who kindly showed me this room when I traveled to Namibia with him for my first two visits.
This room (right) is at the end of a larger building but totally closed off from the rest, so you have to sneak in through the bottom panel of a broken door to get to this. In the afternoon the light streams in through the holes in the corrugated steel over the window, and if you throw sand against the wall, it makes the beams of light stand out like this.
I initially made the same mistake as I did when I shot this four years ago, which was to stand in my own light through the doorway, and that leaves a shadow on the wall on the far right side. Luckily I noticed I was doing that and reshot a few more frames before moving on.
In some ways, I actually like the eery feel of the shadow, but I think I prefer the cleaner blue wall instead.
I shot this at f/14 with a 2 sec exposure at ISO 100. Again, I adjusted my exposure until I was just starting to overexpose the spots of light on the floor and in the hole in the window, and then brought them back under control with the sliders in Capture One Pro
I went on, continuing to photograph the deserted buildings for the rest of the afternoon, and found myself at the school at the very end of the town, before making my way back towards the entrance again. I will share a shot of the school to finish with today, but we’ll finish this first afternoon with a shot from one of the larger buildings near the entrance (below).
Kolmanskop Hall at Dusk
I like this room at this time of day, as the late afternoon sunlight coming in from the door and windows to the left really warm it up visually. I’d love it if there weren’t so many footprints in this room, but unfortunately, we can’t stop people from walking through it, especially as there are two doors, and curiosity generally seems to win out. This was a 4 sec exposure again at f/14, with ISO 100.
Sand Dune Inside Room
There are a few rooms at Kolmanskop that have no roof, so the light shines through gaps in the slats between the first and second floor, making for very beautiful graphical images.
I’d shot one of these during this first afternoon, but the sun was too far over in the sky, so I decided to go back the following day.
I also rediscovered a beautiful room that I photographed during my first visit in 2013 but didn’t find during my 2015 visit. I made a beeline for this room again the following morning, on our second visit to Kolmanskop for this year, as you can see here (right).
At this time though, the angle of the light through the slats was a little too acute, so the slats were only illuminating the walls. I shot this image, then went for a walk around, with the intention of coming back later when the sun would perhaps be at a more cooperative angle.
Unfortunately, shortly after I shot this image, the mist from the sea rolled in, and the sun was gone for the rest of the morning.
That helps in some ways because it reduces the contrast in some of the rooms, so I reshot a lot of images from the previous day, but I was a little sad to not get a nice high-resolution version of one of my favorites images from Kolmanskop in this miniature sand dune house. Still, I don’t dislike this image, which I shot at f/14 for 0.5 sec at ISO 100.
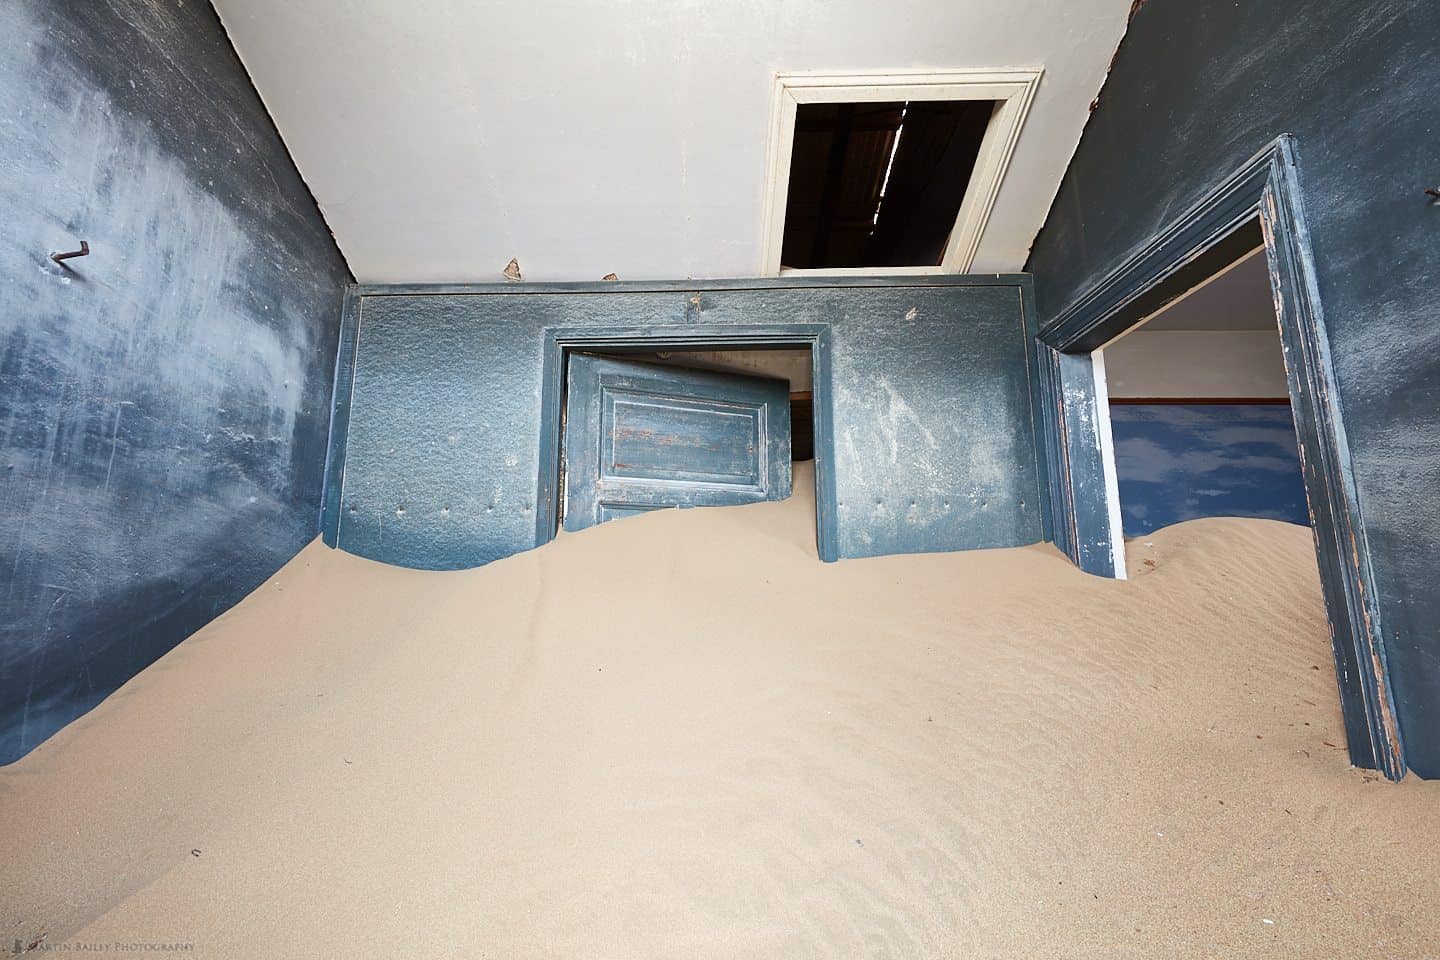
As the mist rolled in I was actually making my way up to the second and probably more famous slat-roofed house, so that shot was not possible on this trip either, but here is a photograph of the room next to that famous room, as once again, I really like the multiple doors and piled-up sand in this one (below).

Sand Piled High
I also like the remains of the wallpaper on the walls in this image and the way the varying degrees of roof collapse give each room a different brightness, making the layers between the rooms much more prominent. You can literally spend days in Kolmanskop just walking from building to building making this kind of photograph. My settings here were f/14 for 0.1 sec at ISO 100.
This next photograph is a reshoot of an image from the previous day because the mist had reduced the contrast. There were large splashes of bright light on the sand in my first shot, so I was happy to be able to reshoot this with more muted colors and less harsh highlights (below).
Kind of Blue
The door to this room is jammed closed by the sand, but if I recall, I shot this through a missing wooden panel, so I’m pointing the camera upwards from a kneeling position, as you might be able to tell from the perspective. I can’t quite put my finger on it, but I do find this sort of photograph ver appealing, with the sand gradually reclaiming these houses back to the desert, and the beautiful colors on the houses. I shot this at f/14 for a 2 sec exposure at ISO 100.
I shot many buildings at ISO 400 as well on this second morning, to avoid camera shake from the high winds, but on close inspection, the ISO 100 versions were all fine too, so my Really Right Stuff tripod isn’t losing its edge, even after ten years of the heavy use I’ve given it.
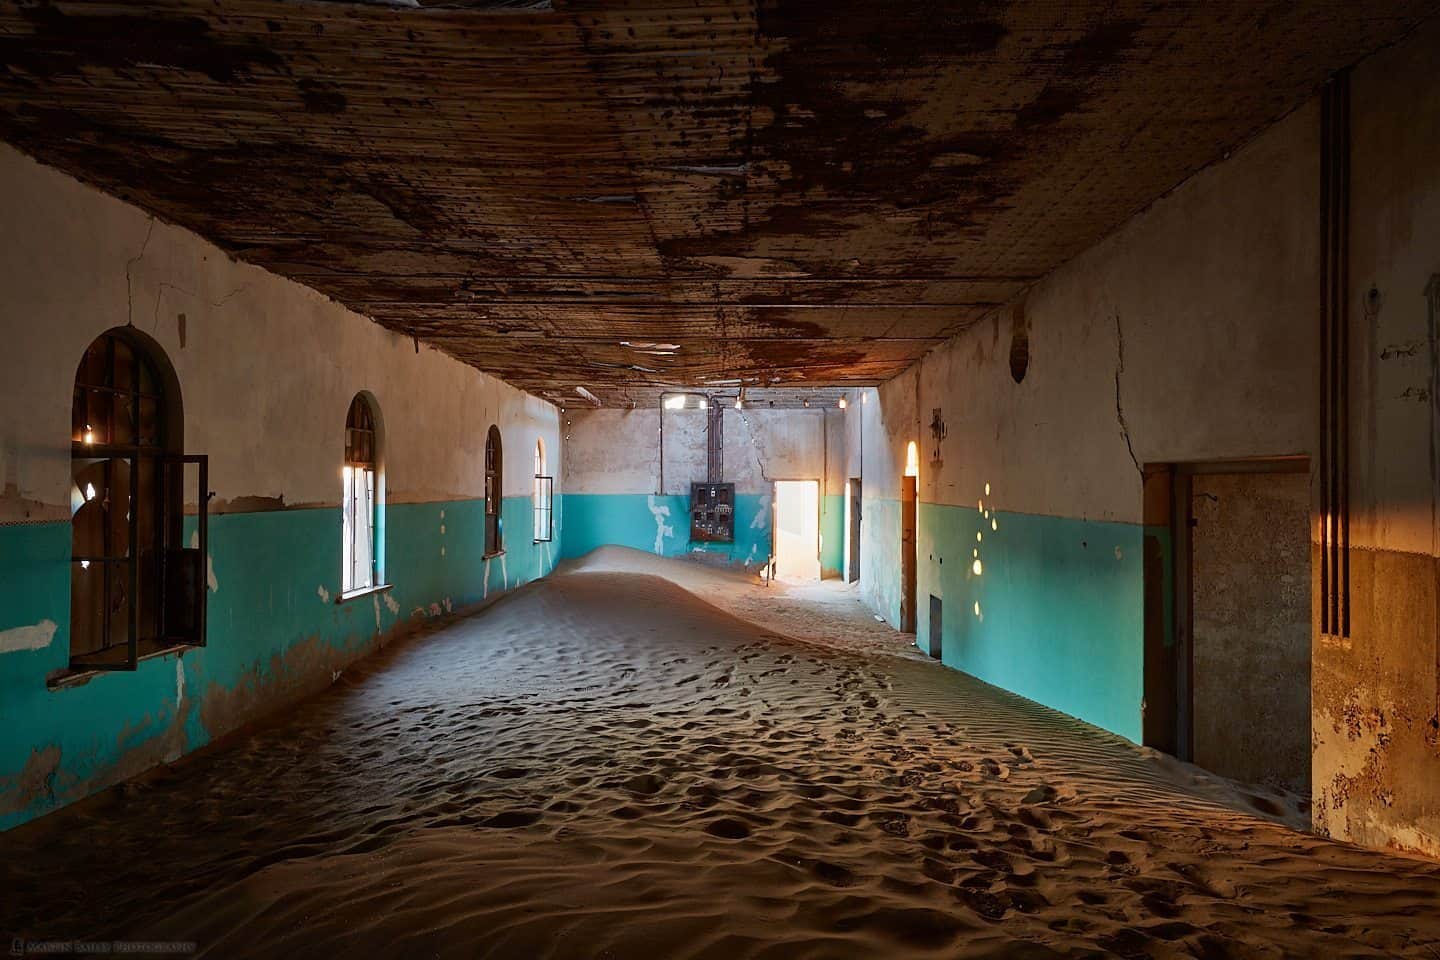
I found myself back at the old schoolhouse at the far end of town by mid-morning. The people that now run Kolmanskop as a tourist attraction market it as a Ghost Town, and of course in many ways that’s a good description. Many of the buildings have an eerie feel, but none, even the darkest closed-off rooms, actually scare me like the schoolhouse does. I don’t know if it’s just because I don’t like schools, but I always get the creeps when I walk through the large hall to the entrance to this corridor, and never feel quite right as I make photographs like this one (below).
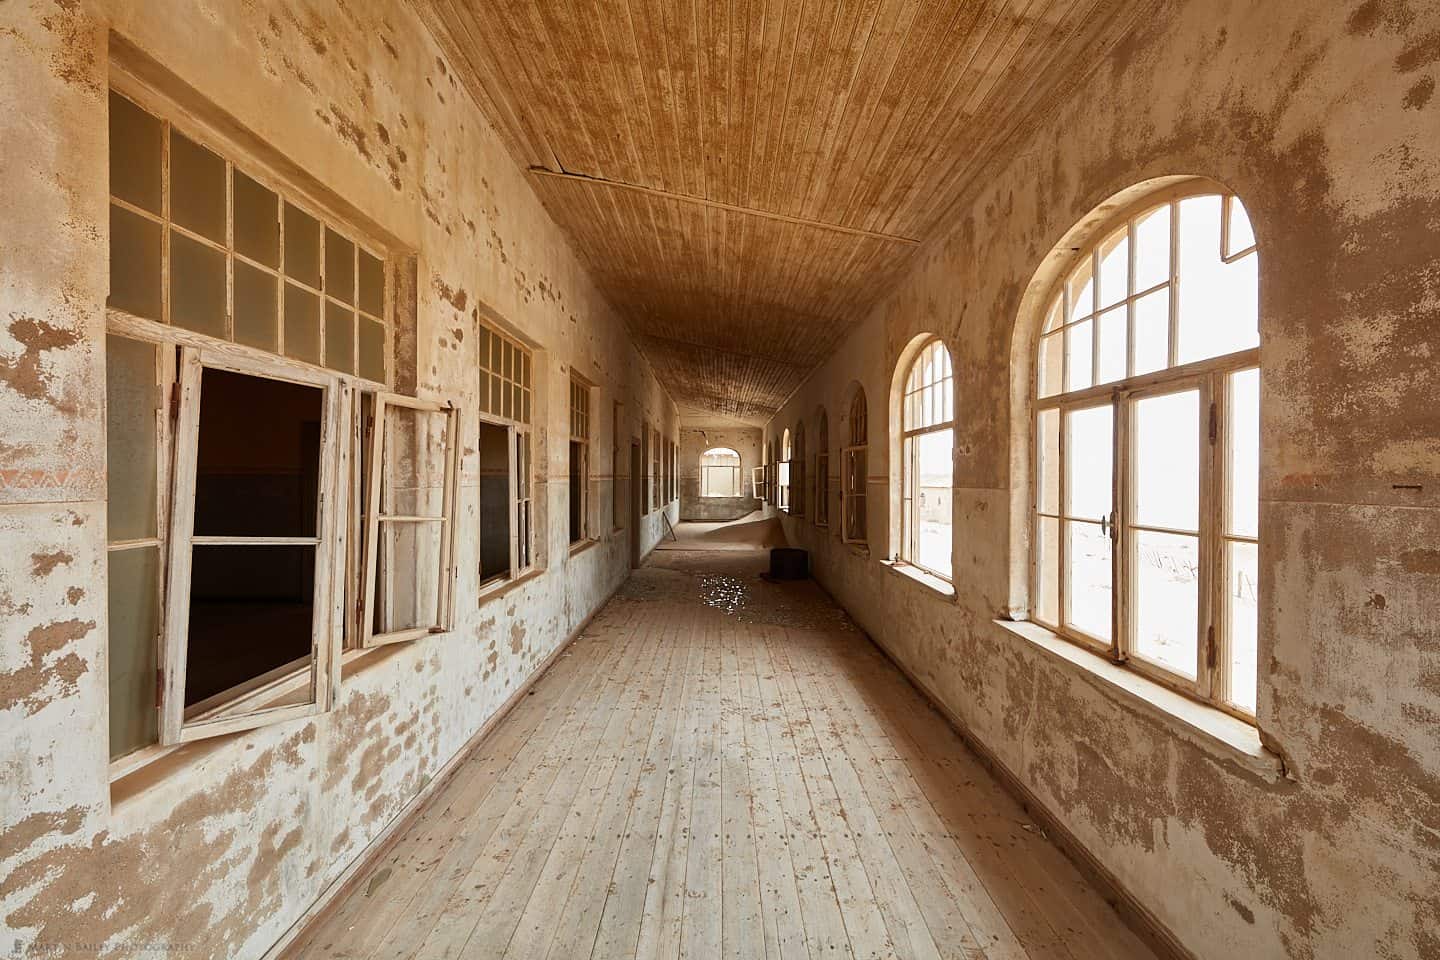
Kolmanskop School Corridor
I actually chose this shot over my photo from the previous day, because the morning light coming in through the windows to the right give this image a much warmer, more inviting tone. They also nicely illuminate the broken glass in the middle of the corridor. But the hair on the back of my head just stood up again as I looked at this image. For some reason, it just gives me the heebie-jeebies. As you might have guessed, I shot this at f/14, with a 0.2 sec exposure, at ISO 100.
One Point Perspective
Another reason for the tension in this image, is, of course down to my decision to employ this centralized one-point perspective composition that Stanley Kubrick used extensively in his movies to create tension and drama. I have shot Kolmanskop like this a lot during my three visits, and just really enjoy this look, as spooky as it is.
Anyway, we’ll pick up the trail in the next episode as we visit Elizabeth Bay after lunch on this third day of the tour. I’ll hopefully have a better idea of how many episodes this series will become at that point, but I think we’ll be looking at probably four episodes, which I hope you’ll enjoy.
Complete Namibia Tour 2018
If you would like to join me in Namibia on my 2018 tour, please do check out the details and you can book from the tour page at https://mbp.ac/namibia.
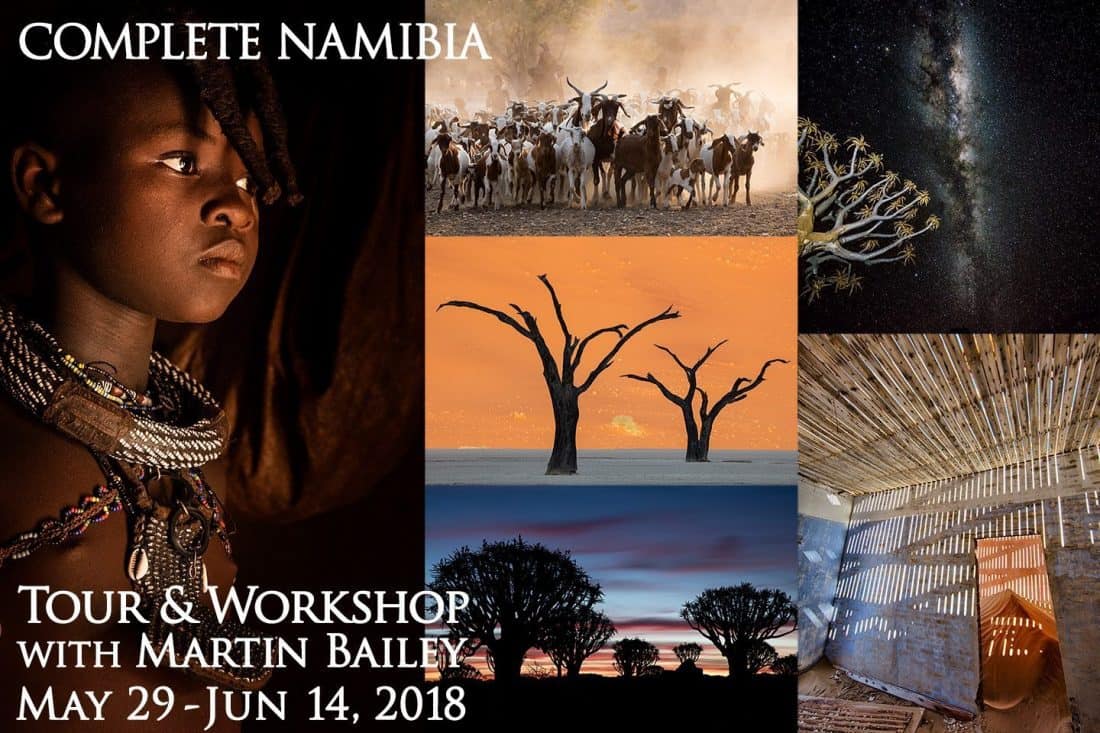
Complete Namibia Tour & Workshop 2018
Show Notes
Details of Namibia 2018 tour: https://mbp.ac/namibia
Video of examples of Stanley Kubrick’s one-point perspective videography: https://youtu.be/flq0t4jrqJQ
Subscribe in iTunes for Enhanced Podcasts delivered automatically to your computer.
Download this Podcast in MP3 format (Audio Only).
Download this Podcast in Enhanced Podcast M4A format. This requires Apple iTunes or Quicktime to view/listen.

Great photos Martin. Sand Dune Inside Room and Sand Piled are very nice, but the Kolmanskop School Corridor is my favorite. The warm tones, the three different textures of the walls, ceiling, and floor, and the very dark windows on the left with the bright windows on the right. The way everything leads to the small view of the window on the far wall. The object on the floor in the shadows leaves a bit of mystery with some nice reflection of light in front of it. I absolutely love everything about this photo. Can’t wait to see more from the rest of your trip.
Josh
Thanks Josh! I’m really pleased you like these. That object of the floor is an old oil drum or similar. I have a closer photo too, but I prefer this overall. Thanks for the thoughtful comment!
I’m currently working on the rest of my images still. I’m hoping to finalize my edit by the end of the week, but if not, I’ll select the next best ten and share those in part #2.
Regards,
Martin.