
0:0017:15 | Visit Library for MBP Pro eBooks |
I have been using a few techniques to prepare specimens to take microphotographs of, and have just added the word Microtome to my microphotography glossary, so I figured I’d share some of this information with you today via the podcast. It’s still young and doesn’t have that many entries, but if you are interested in microphotography, you may find my glossary useful, but nothing is useful unless you know it exists. Almost a year ago now, when I started to make photographs with a microscope, in the spirit of sharing what I am learning as I learn it, I started working on a glossary. It’s as much if not more for my own purposes than anything else, but I linked it to the Microphotography menu that I added under the Posts menu at the top of the website.
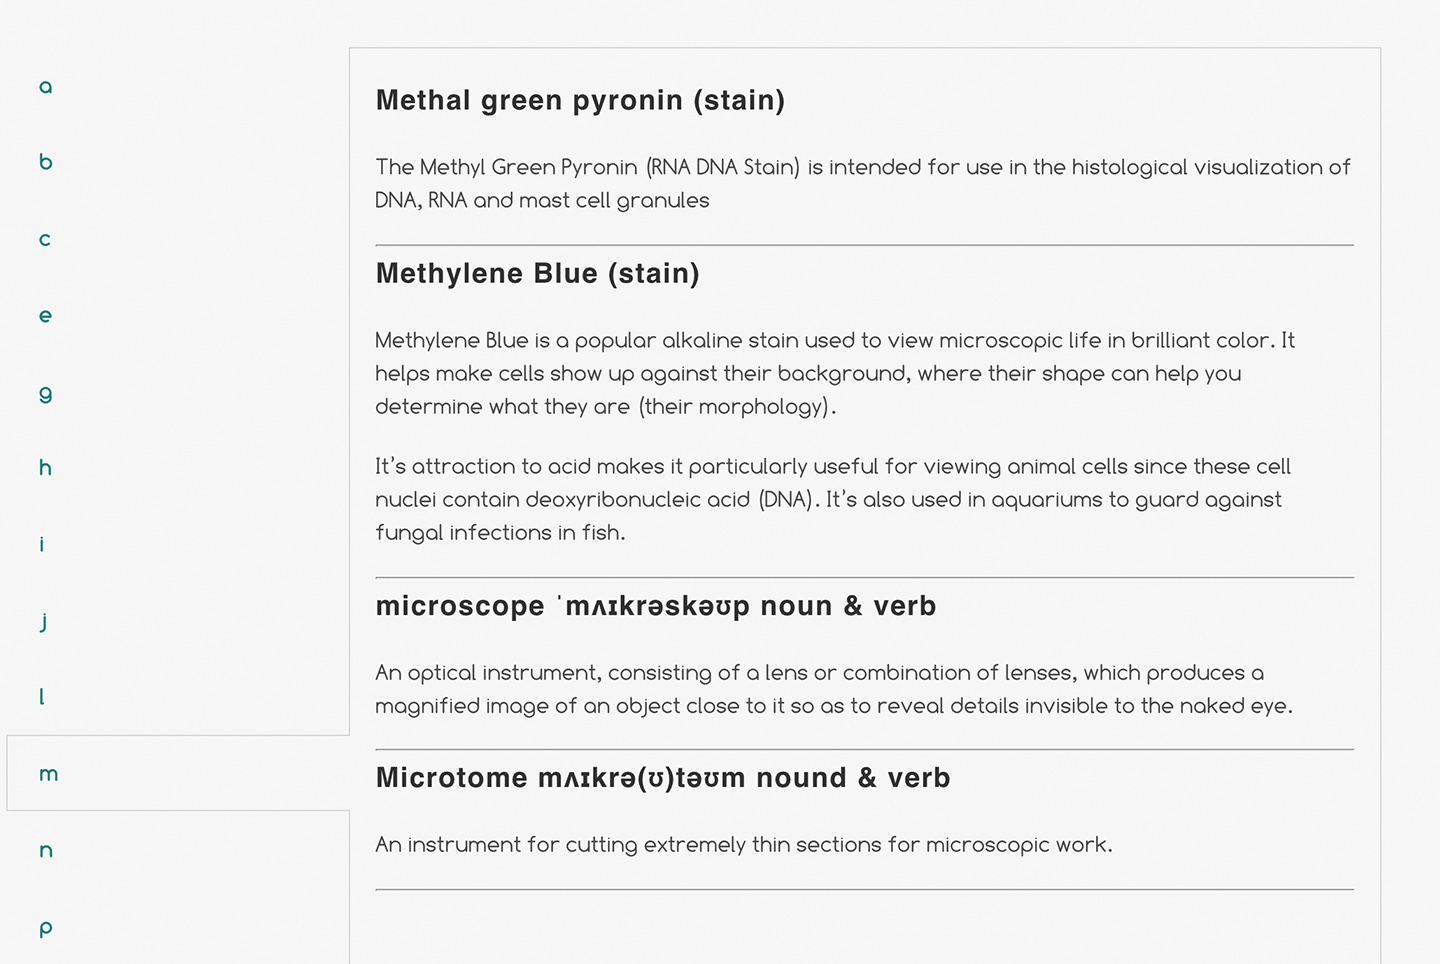
With just four entries now that I’ve added Microtome, the M category is in first place with the S category at three entries in second place, but the S category has a higher word count, so it’s not worried about falling behind. As you can see from this screenshot, I am adding various terms, but also included a number of stains that I’m also using, so we’ll touch on much of this today in my continued Microphotography series.
What is a Microtome?
So, if you are like me, and had little to no experience with microscopes, you may be wondering what I Microtome is. I first heard this word about eight months ago as I started to learn how to prepare my own plant specimens for the microscope. A microtome is basically a tool to cut thin sections of your specimen so that they can be studied, and in my case, more importantly, photographed, under the microscope. Anything opaque that is much thicker than a few thousandths of a millimeter basically prevents any light from passing through it, which can make it difficult to see and photograph the specimen with a light field microscope. You can use dark field as I’ve mentioned before, where you block out the light from directly below the specimen, and allow light to spill onto it from the sides, but in light field microscopy you need a certain amount of light to pass through your specimen.
For quite a while, I was using a makeshift microtome, which was essentially just two halves of an old-fashioned razor blade. If you place your specimen, say for example, the stem of a plant, on a piece of foam in water, and cut it with two halves of a razor blade pressed together, you will often find yourself with a very thin section of the plant between the two blades. Without the water to lubricate the cut and support the thin slice, it will often just break up as you remove it from the razor blade, so the water is important.
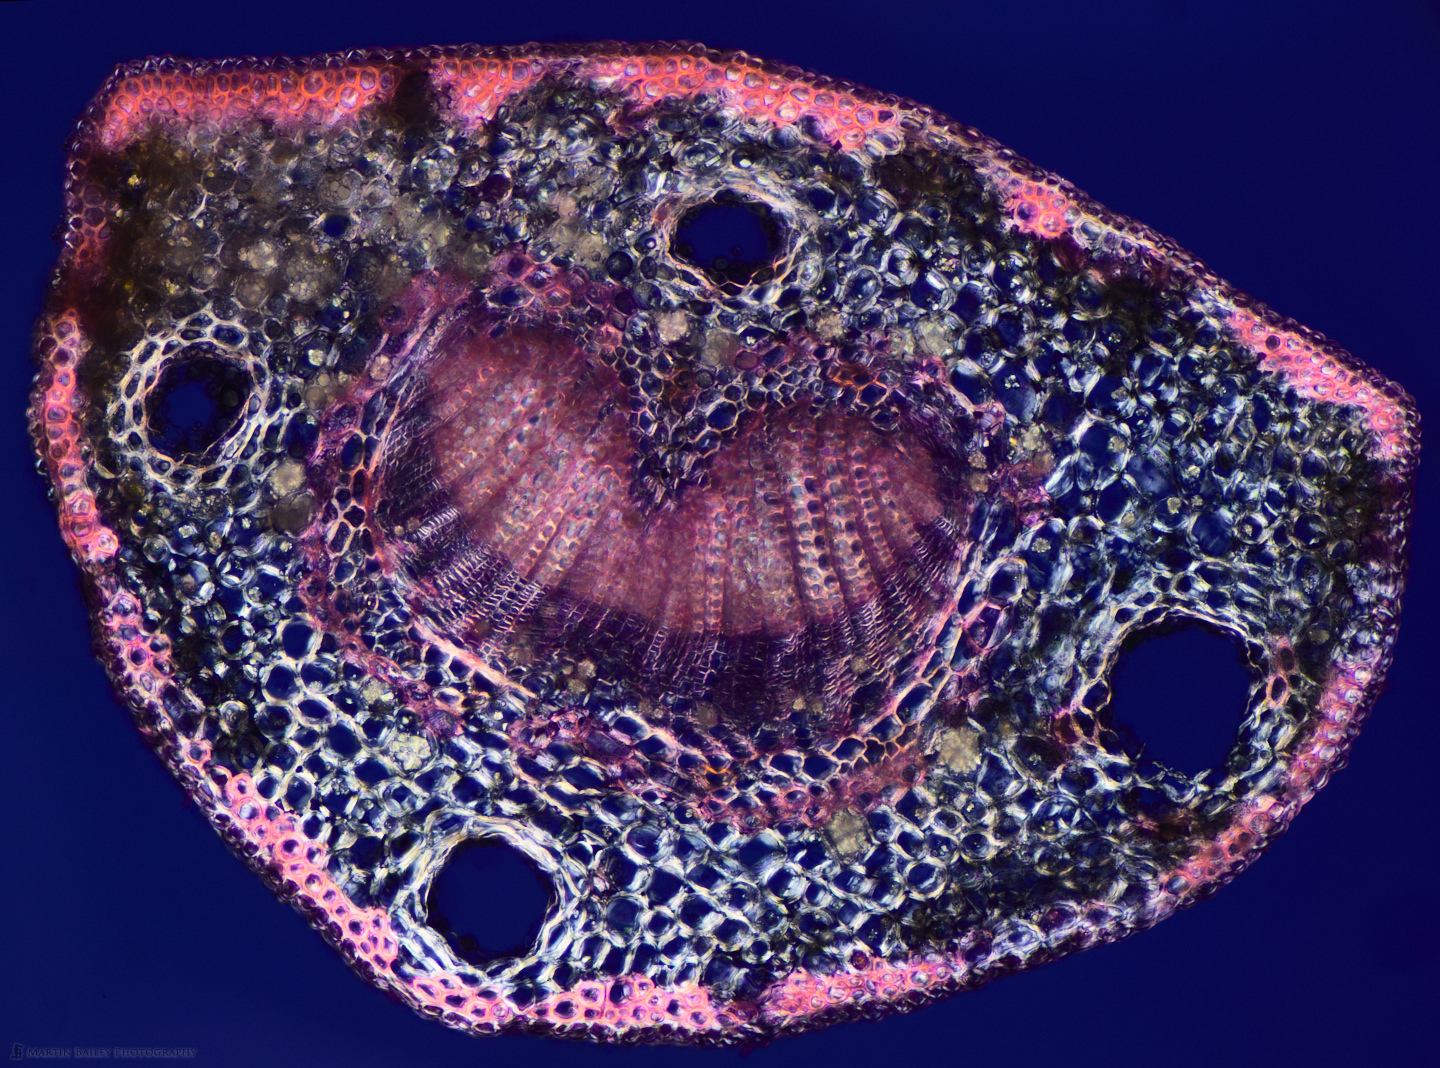
I didn’t document the broken razor process in photographs, so I have nothing to share, but I was relatively successful at creating sections of plants using this method. Here is a photograph of a section of an Azalea stem that I cut from the bush at the foot of my apartment steps. As you can see, the light is passing through parts of the section quite nicely, because it’s thin enough to cut many of the cells and fibers across their width allowing the light to pass through, but also, although this could be thinner, the material of the plant that is left is also allowing some light through in most areas. I also like how many of the microscopic hairs can be seen along the edge of the plant here.
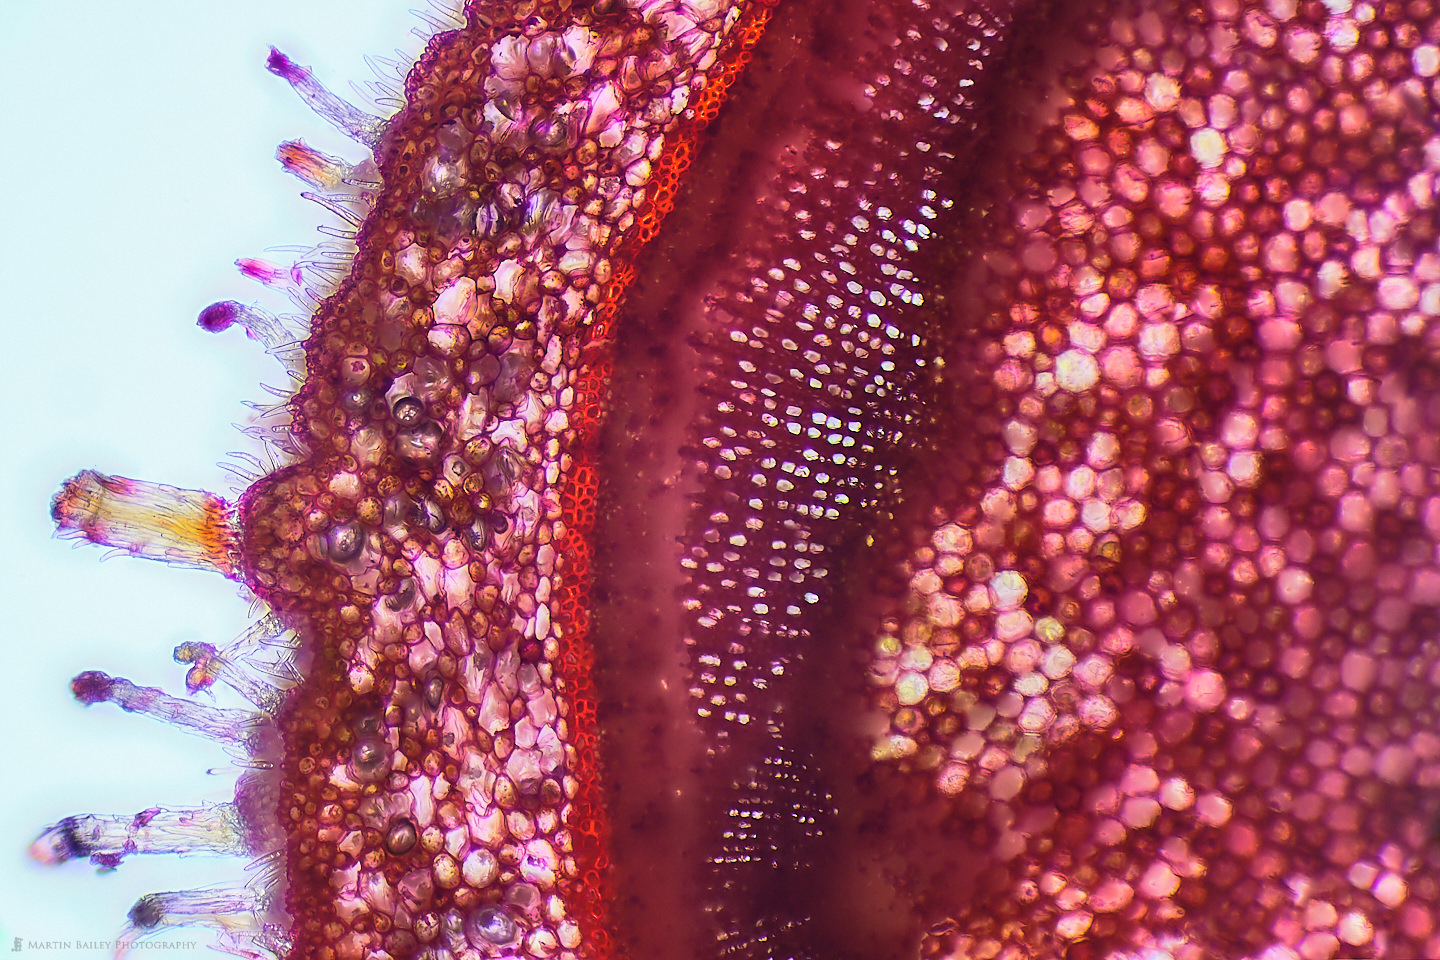
The red color in this specimen comes almost exclusively from the Safranin stain that I applied. I probably should dilute it more, but I really like the strong colors that I get when I simply place a drop of the stain on top of the section when it sits in probably an equal amount of water on my microscope slide, so it’s about 1:1 water to safranin. I’m no chemist or biologist, but I read that safranine binds to acidic proteoglycans in tissue, so although I’m guessing here to a degree, I imagine this is why it strongly stains the starch sheath or endodermis, which is the bright red line that you see running up the middle of the photograph.
The problem with using two razorblades is that even though you hold the dull end of the blades, you still end up with lots of tiny cuts on your fingers, and the thickness is often uneven, with the section getting gradually thicker as the stem is cut. In a bid of overcome this, I bought a hand microtome, which is the device you can see in this iPhone shot from last week, when I spent a few hours cutting and photographing the stem of one of our lunchtime strawberries.
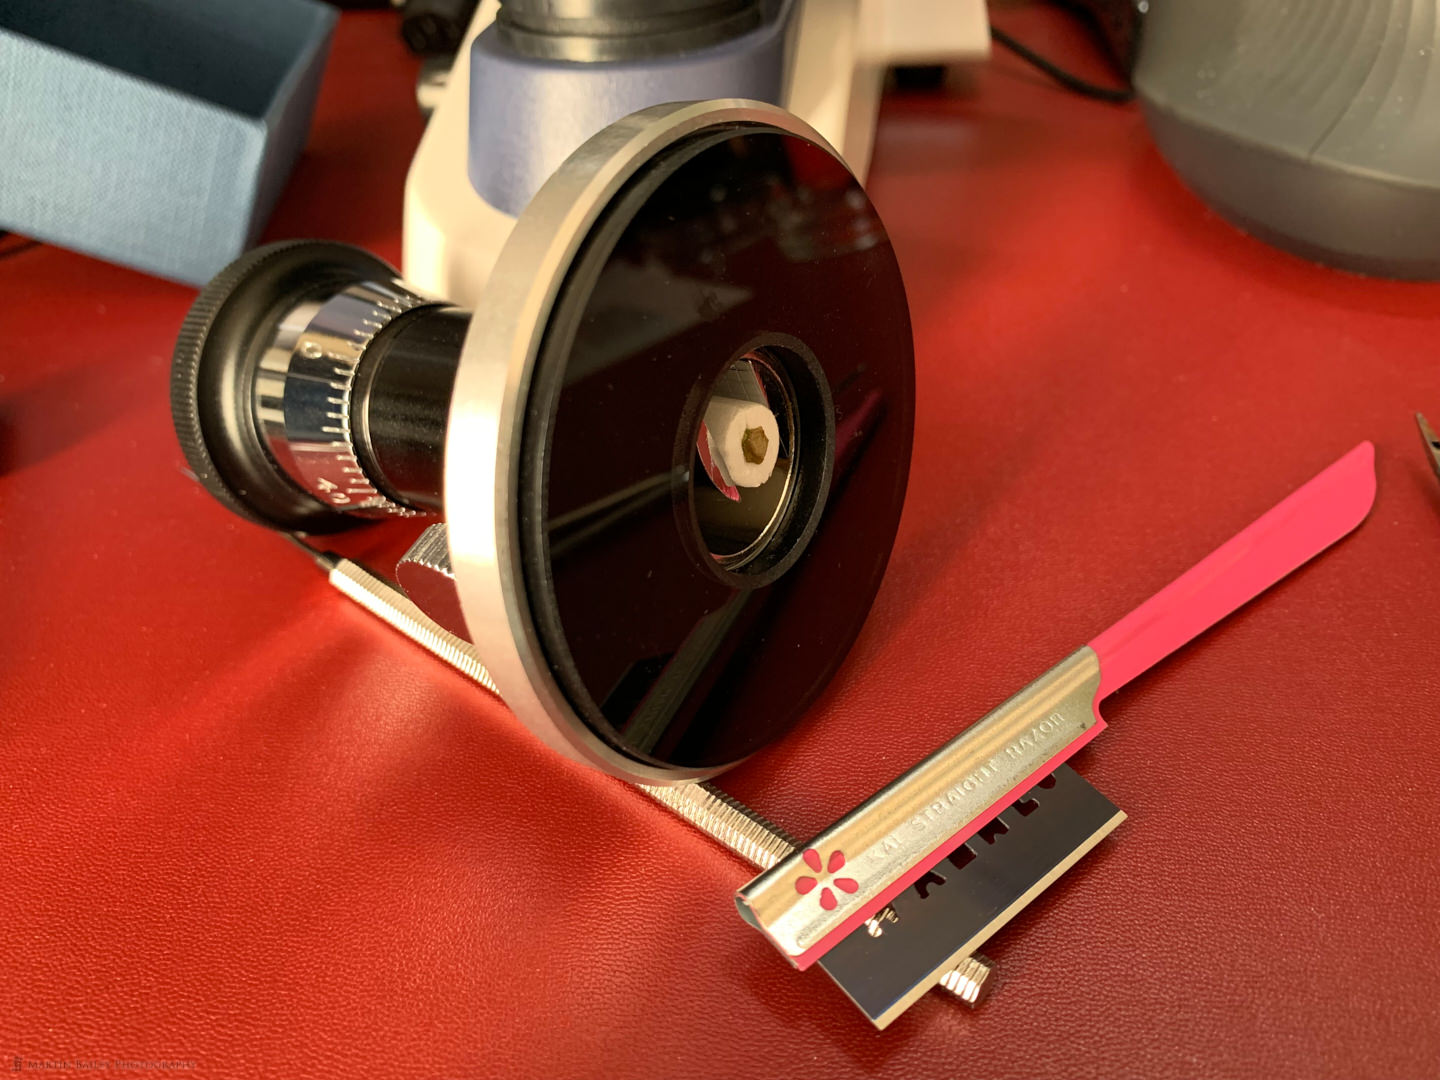
You can see the strawberry stem inside the foam dowel that I cut in half for a couple of centimeters, then cut out a bit of a groove that I placed the stem into, and then clamp the dowel into the microtome with the screw on its side. Then I wet the razor blade that you see in the foreground, and run it along the glass surface of the microtome, cutting off a thin section of the stem. You then rotate the base of the microtome to move the specimen up slightly and cut another section. The more you rotate the base of the microtome the thicker your sections become. The goal is to cut very thin sections, but it takes practice, and I’m still getting the hang of it myself.
Here you can see a Petri dish with some water in it, and some of the sections that I tried cutting from the strawberry stem. The one in the foreground was a little too thick, but the others were quite interesting to take a look at. Here also is a photo from a few months ago, showing a number of slides of sections of a cucumber stem, which are the round sections, and there are also a number of sections of the skin of the cucumber a little further into the cucumber from the stem.
Stained Cucumber Sections
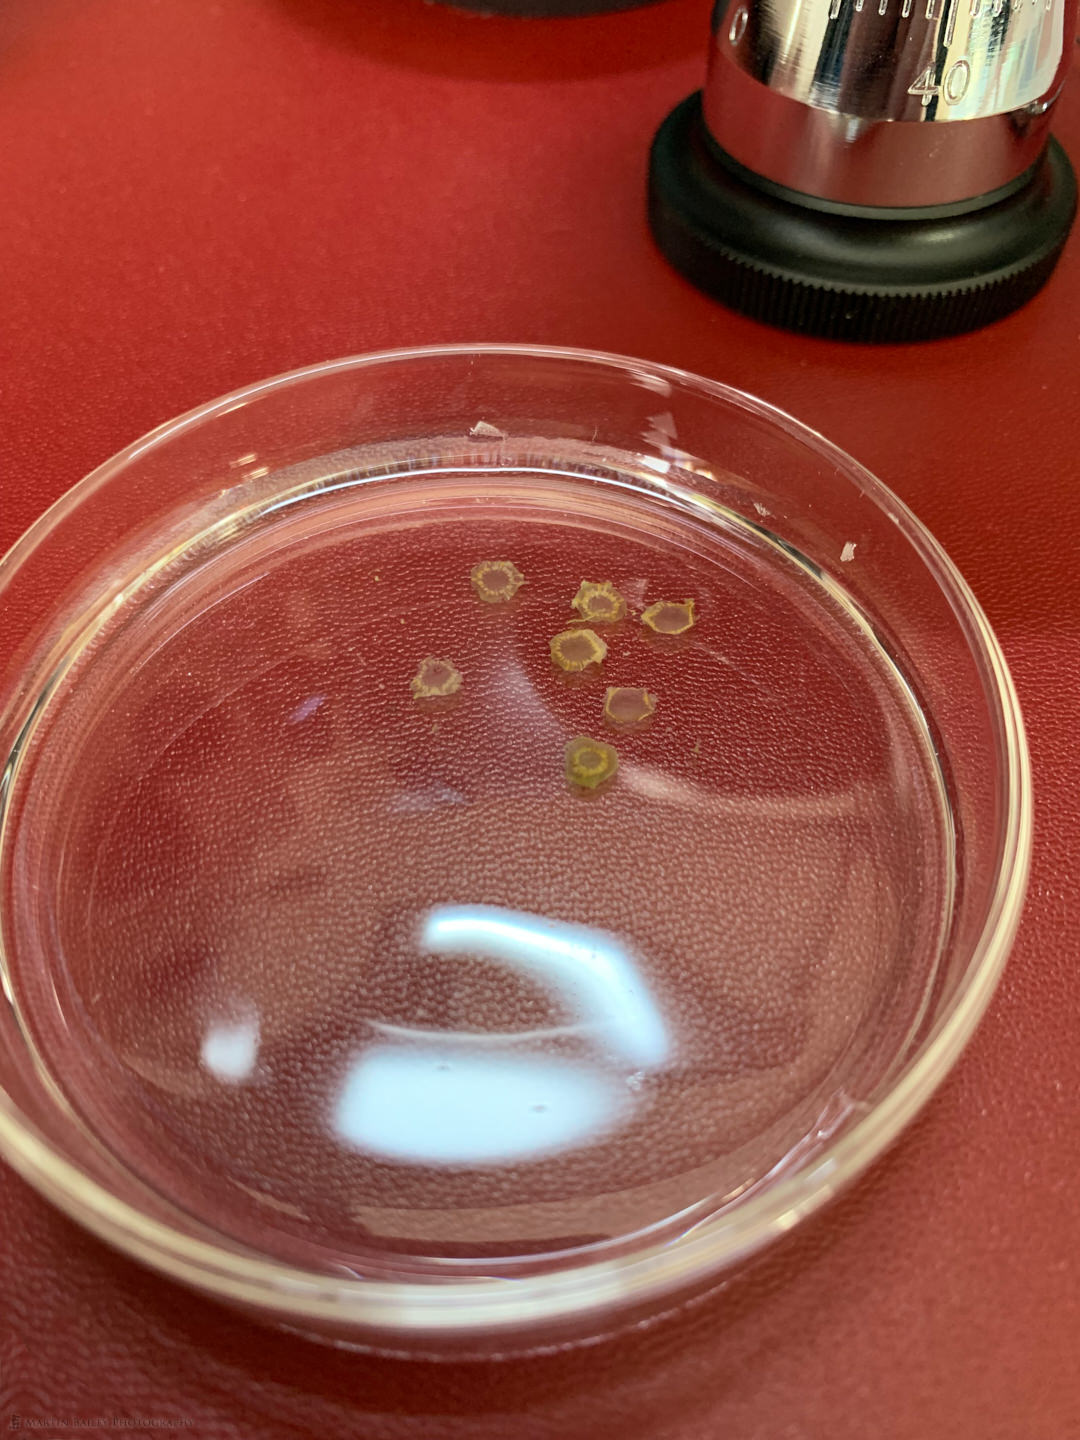
Strawberry Stem Sections
I read that the best way to transport these sections from the water to the microscope slide is to use a fine-haired brush, but I haven’t got one of those yet, so I have been improvising by using a tiny chemist spoon to scoop my sections out of the water, or sometimes I just use a drop of water from a pipette to wash the section off of the razor blade dropping it directly onto the slide, where I then apply a drop of stain.
Staining and Preparation
The amount of time that you need to stain a specimen varies from stain to stain. I’ve also stained a blood sample using Leishman’s stain, so that I would see my own blood cells, and that required quite accurate timing. Most of the time with these plant segments, I don’t worry too much about the timing, and generally leave the stain on for anything from a few minutes to ten or fifteen minutes or so, as I continue to work getting more sections. I find that it’s more important to keep the sections moist, so I don’t allow them to dry up on the slide. I either leave them in the water in the Petri dish until I’m ready to stain them, or I drop the section straight onto a slide and apply a drop of stain straight away.
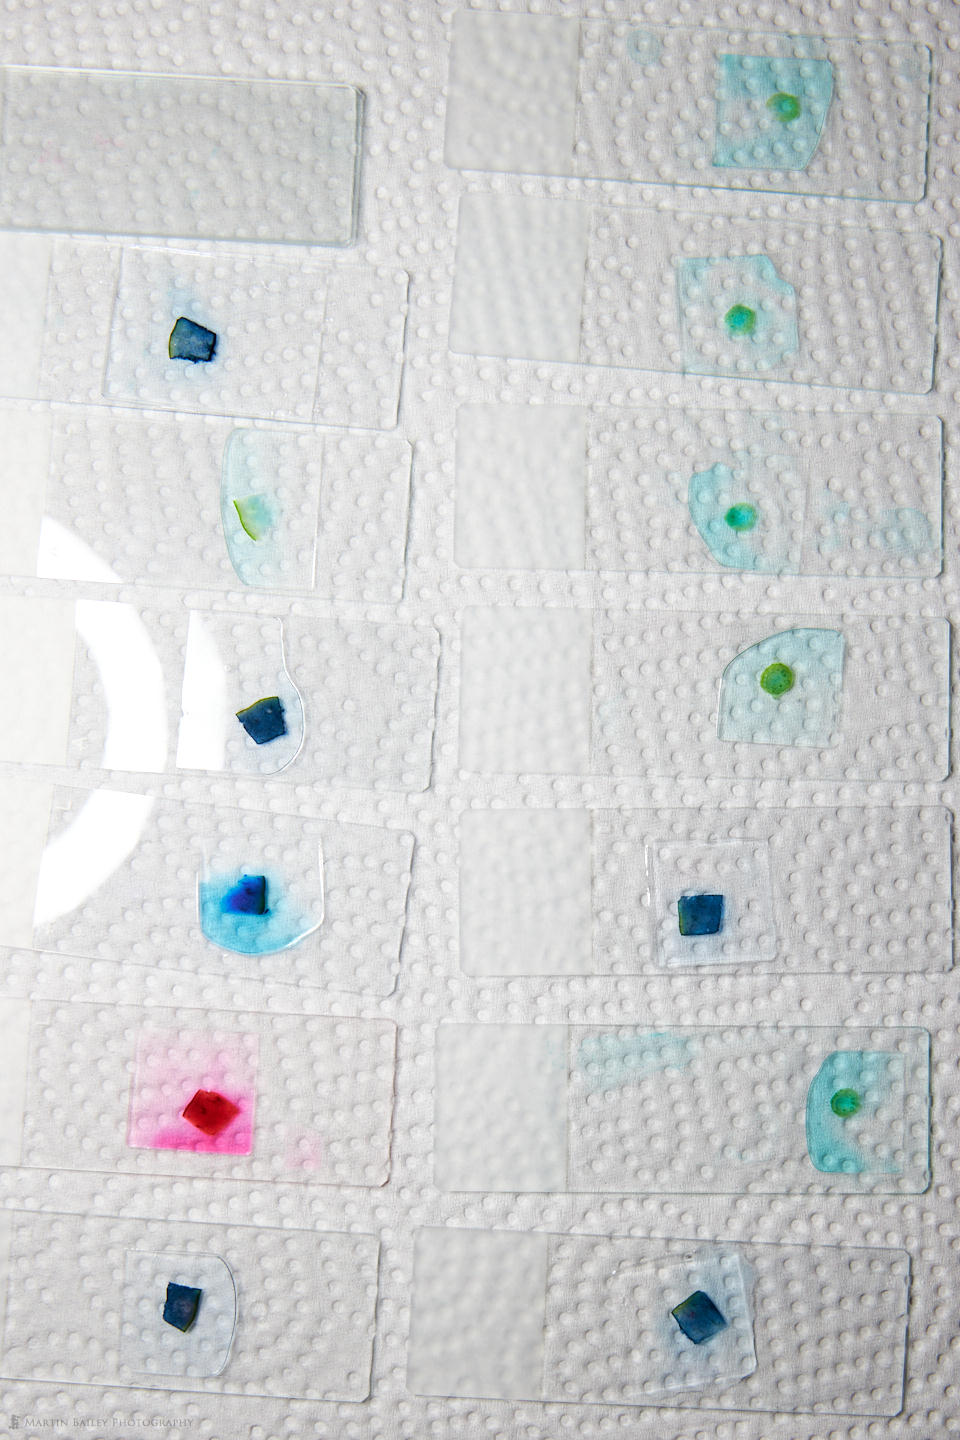
After leaving the stain on the specimen for a while, I generally just drop some purified water onto it a number of times, until the water starts to look clear. In the above photo there was still quite a lot of stain around some of the sections, but I’m now trying to wash more of it away. After placing a few drops of water on the slide, I use some lens cleaning paper to draw the water away. I then place a drop of Gum Media onto the specimen if I want to create a permanent slide or Glycerine for a semi-permanent slide, although I have found that with plant sections Gum Media works a little better as it doesn’t dry up the specimen as it hardens. I also have some Canada Balsam to try but haven’t gotten around to that yet.
Horses for Courses
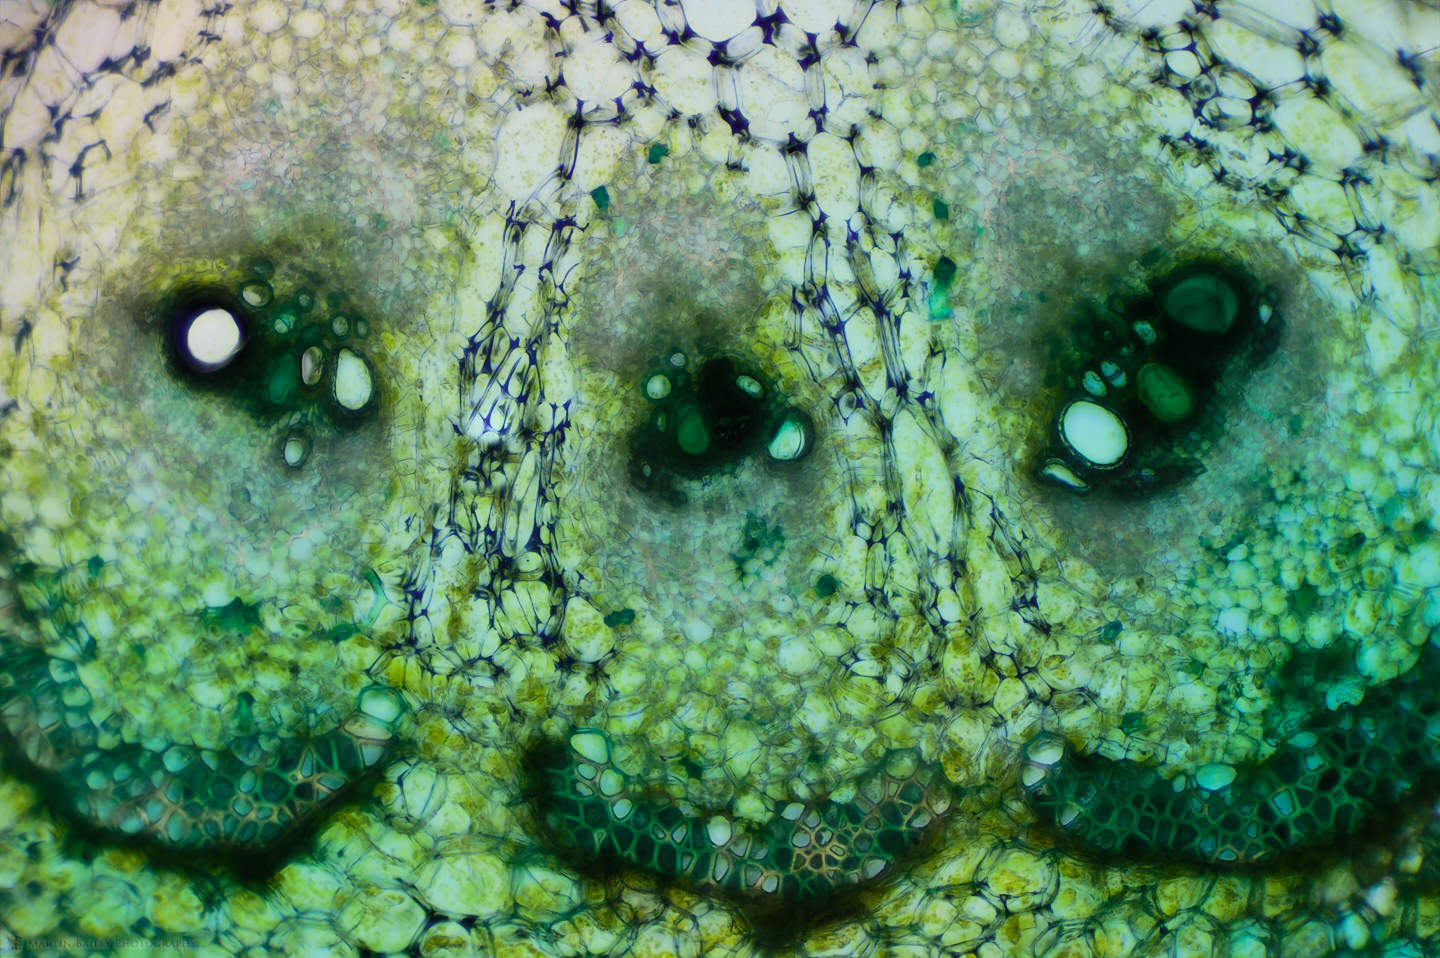
You can see that I used various colored stains which I’d also like to talk about a little. As I experiment with microphotography and the various sciences that it enables me to dabble in, I’m finding it fascinating to try various stains to see how they interact with the specimens I’m photographing. The Safranin that I used on the Azalea stem is beautiful, but we generally don’t associate plant stems with the color red, so I also sometimes use a light green stain, as I did for some of the cucumber stem shots, such as this one, showing three of the vascular bundles at 100X life-size magnification.
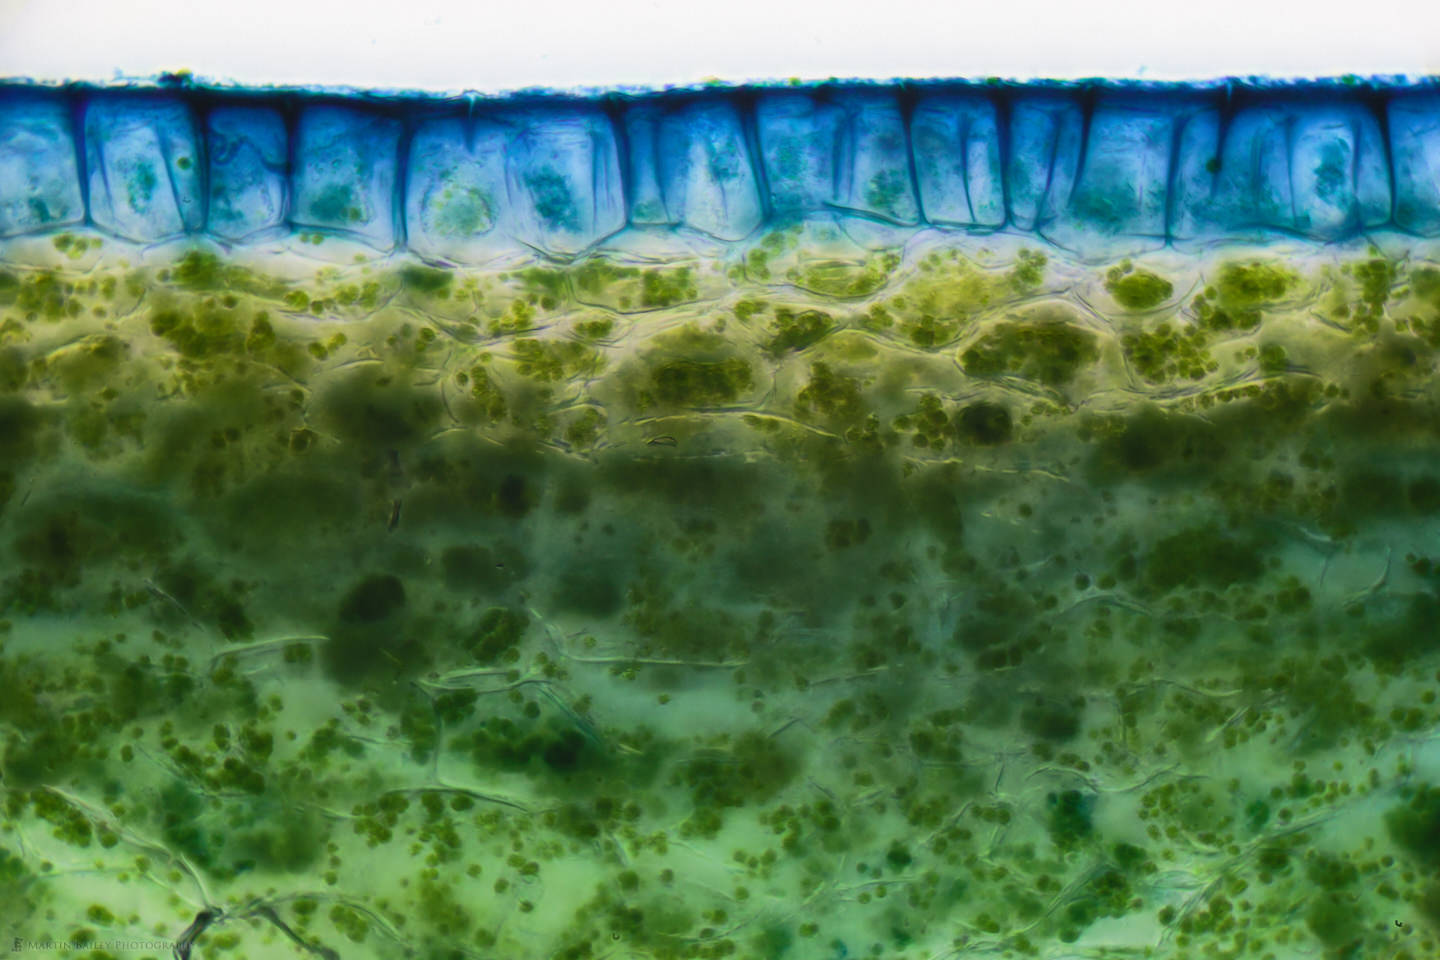
Here, for example, I used a Janus Green stain, which is actually more blue than green, but you can see how it reacted differently to the outer skin or epidermis of the cucumber, staining the cells there blue, while leaving the cells in the periderm mostly clear, and making the chloroplasts clearly visible. To me, this is completely fascinating to be able to experiment like this, and see things that I would never have dreamt I’d be able to see with a $300 microscope, although granted, it does have upgraded objectives.
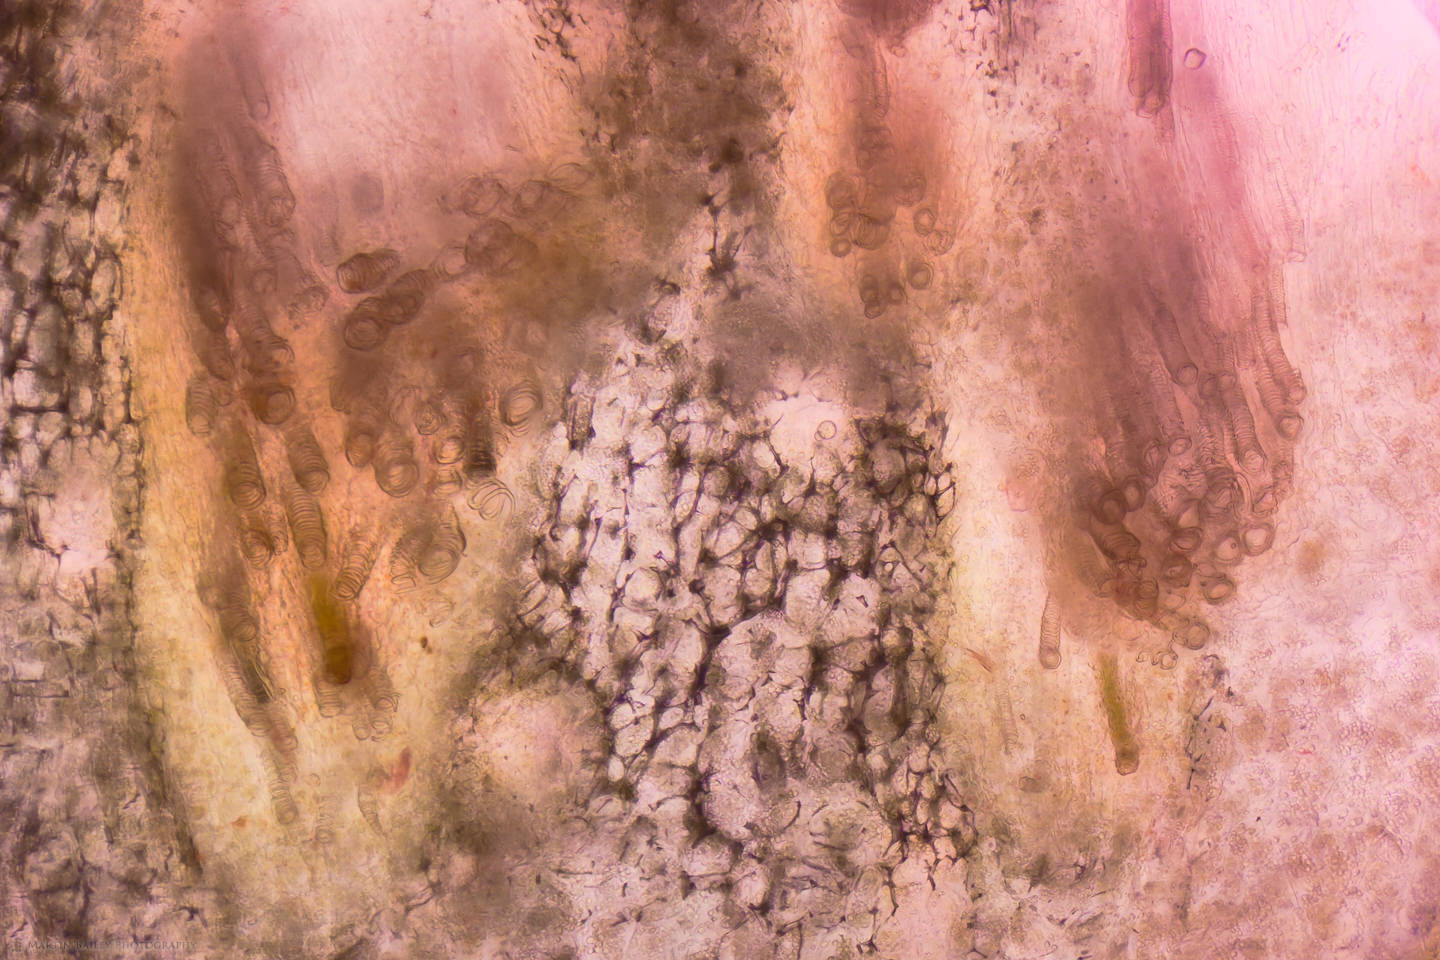
I also selected a more appropriate color stain for this next image. This shows the Protoxylem Vessels near the stem of a carrot, stained with Eosin Y, which is an orange-pink-colored stain, which I thought would look more natural for a carrot. Again, it’s fascinating that we can see what are essentially the veins of the carrot stems as they enter the carrot. In some ways, it’s pure luck that I got a section right at this point, but as we know, we make our own luck. Just doing this stuff and making many different slides to look at helps me to find things that I didn’t even know I was going to stumble across.
I also used the orange-pink-colored Eosin Y stain for this section of a Gingko leaf stem, that I picked up during a walk in the city a few weeks ago. This was stained and placed between two polarizing filters to bring out that almost jewel-like color that I really like. Although most of the time I find myself attracted to higher magnification portions of these sections, for this shot, I actually did four slightly overlapping 20 frame stacks and then stitched them together, using the new stitching feature in Capture One Pro version 22, which I’m really enjoying. That gave me a 100-megapixel photograph of something barely 2 millimeters in diameter. It doesn’t get much geekier than this.
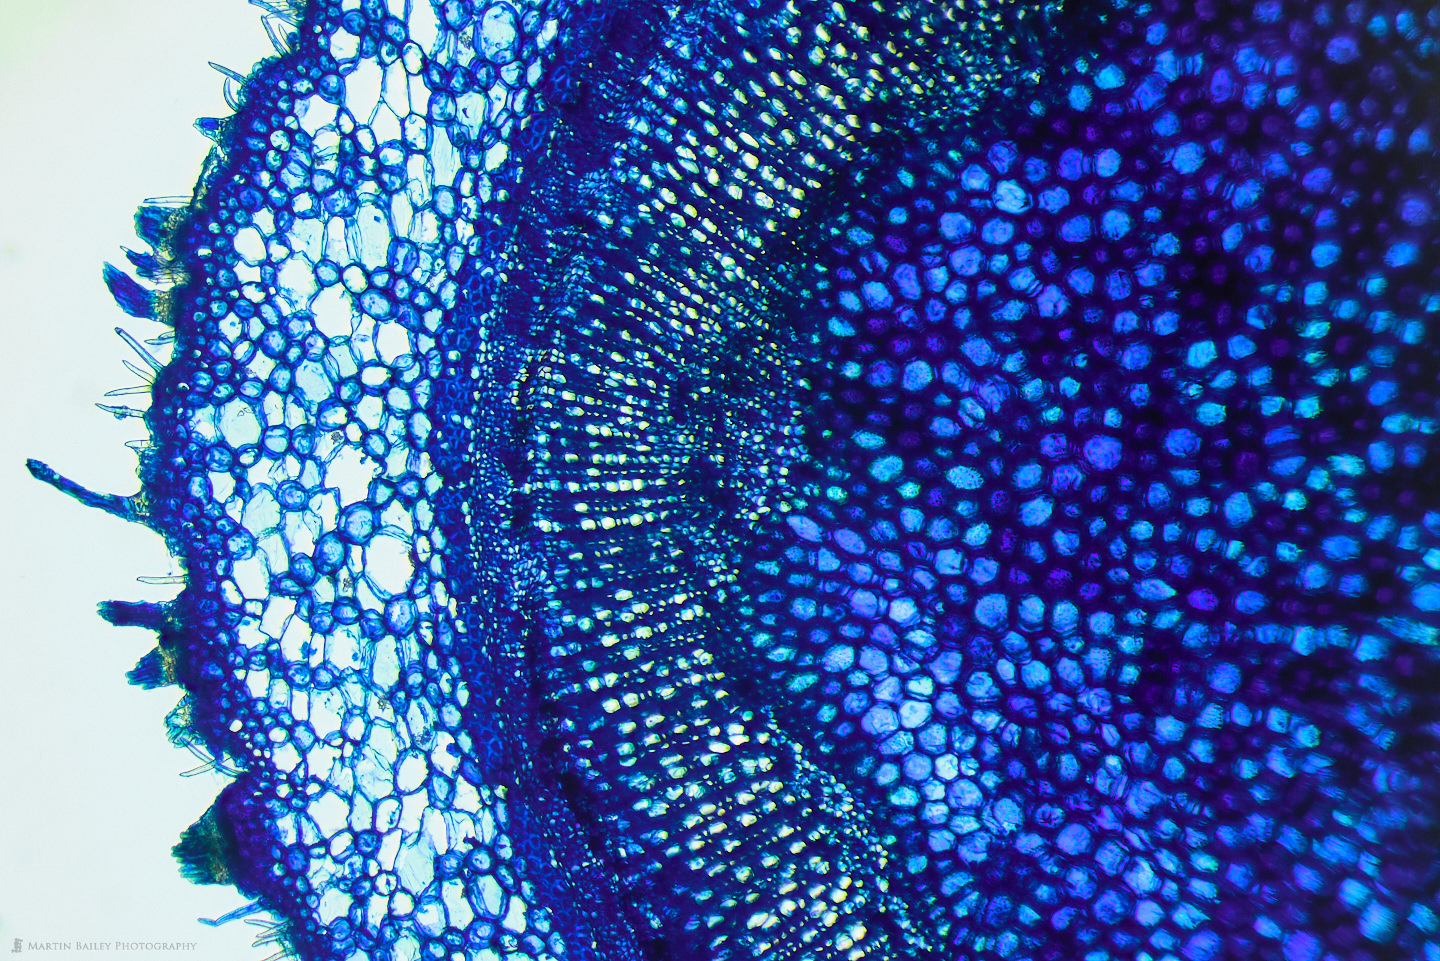
To bring the staining conversation full circle, and show one last stain, here we are back to the Azalea stem that I started off with, but this time, instead of Safranin I used Methylene Blue stain. Again, I probably should have diluted it a little more, but I really do like the strong blue that this stain provides, and love that I can take the same specimen and make so many variations.
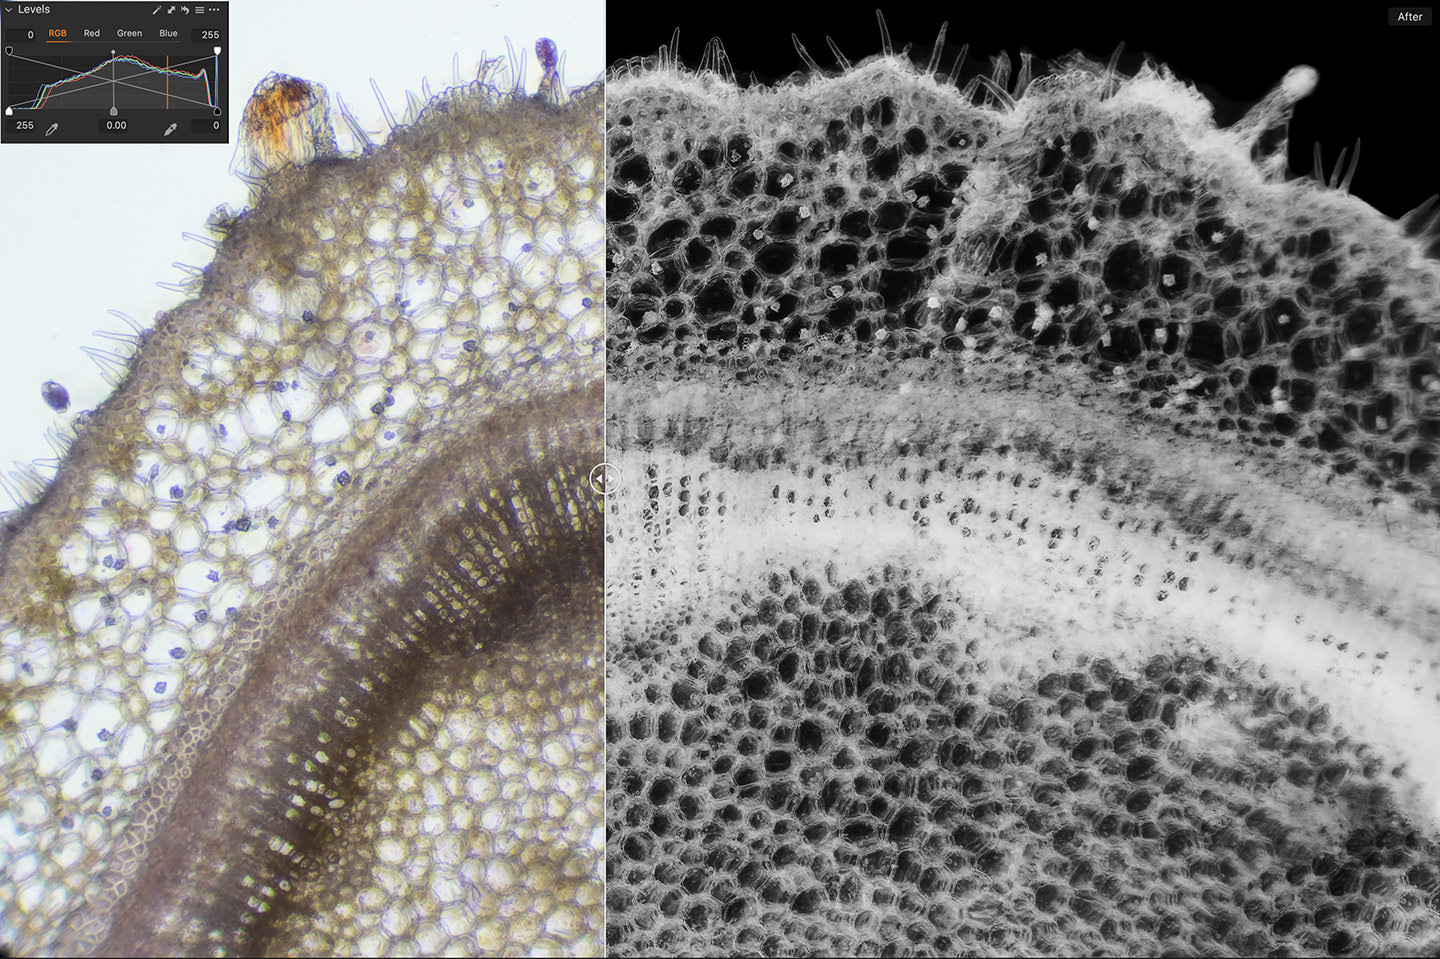
Also, one other thing that I sometimes do, is to simply invert the color of the photograph, as that can be quite effective too. Here is a before/after screenshot of a photo of the Azalea stem with light staining using Aceto Carmine, but because it was relatively uneventful, I inverted the color completely in Capture One Pro, by taking the black point and white point on the levels tool and moving them into the opposite positions. This is a quick and easy way to invert the color using the RGB Levels. Then essentially with a color negative, I flipped it into black and white. I’ve embedded a screenshot of the levels into the screenshot of the before/after so that you can see what I did.
OK, so we’ll wrap it up there for this week. I know this sort of photography isn’t everyone’s cup of tea, but it’s keeping me sane as the pandemic keeps me indoors, and I’ve actually developed a passion for this work that I didn’t expect when I started, so I hope you’ll bear with me as I occasionally jump down this microphotography rabbit-hole. And before we finish, I’d like to say a huge thank you to our new Patreon supporters Joseph and Trevor. Thank you to all of the patrons that are helping to keep the wheels on the MBP Wagon.
Show Notes
Check out all of our Microphotography related posts here: https://martinbaileyphotography.com/microphotography/
Subscribe in iTunes to get Podcasts delivered automatically to your computer.
Download this Podcast as an MP3 with Chapters.
Visit this page for help on how to view the images in MP3 files.

)
)
)
)
)
)
)
)
)
)
)
)
)
0 Comments