Bring your KORG Minilogue XD to Life!
We are excited to announce the immediate availability of our latest software offering, the KORG Minilogue XD Ableton Live Integration!
This Max for Live plugin enables full integration with the KORG Minilogue XD or XD Module, including two Minilogue XDs in Polychain mode. When recording MIDI information, your changes to settings and dials will be recorded and played back faithfully when playing MIDI clips, so you can even record music, then adjust the dials on the plugin or your Minilogue XD as you play back your MIDI, even while recording a sample, for a more dynamic performance.
The initial inspiration for this project came from the fantastic work that Andrew Norris did with his patch for the original Minilogue, but after weeks of working on an update and hitting a wall with the Javascript, I found a tutorial from Jeremy on the Cycling74.com website that provided 90% of what I wanted to achieve. I scrapped most of the backend, rewired it with the code from Jeremy’s tutorial, and added a number of additional scripts to create something I personally am now thrilled with.
Requires Max for Live - Works with Ableton Live 12!
This plugin has been tested on both Ableton Live 11 and 12. Note that this plugin requires Max for Live, which is included in Ableton Live Suite, and available as a paid add-on for Ableton Live Standard. Max for Live is not supported in Live Lite or Intro.
As you can see from the screenshots below, there are a lot of controls, some of which aren’t easily accessible on the Minilogue XD itself.

As significant as the interface is, I added a button in the bottom right-hand corner to access a few less frequently used settings.

The plugin requires you to add an Ableton External Instrument so that the MIDI out is played via the Minilogue XD and audio from the Minilogue XD will then also be available in Ableton Live for playback or to be recorded via your audio interface. See using the patch below.
Installing the Plugin
All you need to use this plugin is the MinilogueXD.amxd from the folder you’ll unzip after purchase. For easy access, drag the MinilogueXD.amxd file to your User Library in Ableton Live, and it can be used in any project from there after that point.
Using the Plugin
Drag the plugin to a MIDI track and set the MIDI From to All Ins or minilogue xd (KBD/KNOB).
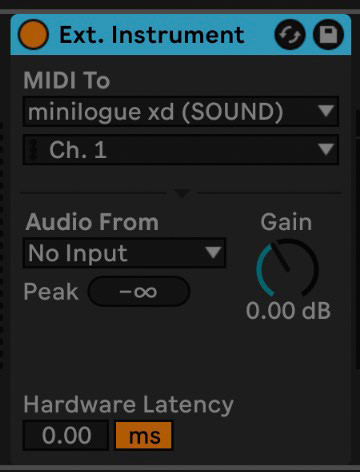
From Ableton Live Instruments, drag an External Instrument to your MIDI track and drop it to the right of the main plugin area. Ensure that you have your MIDI instruments for the Minilogue enabled under Settings > MIDI, and in the External Instrument MIDI To pulldown, select minilogue xd (SOUND). Audio From should be set to your audio input channels.


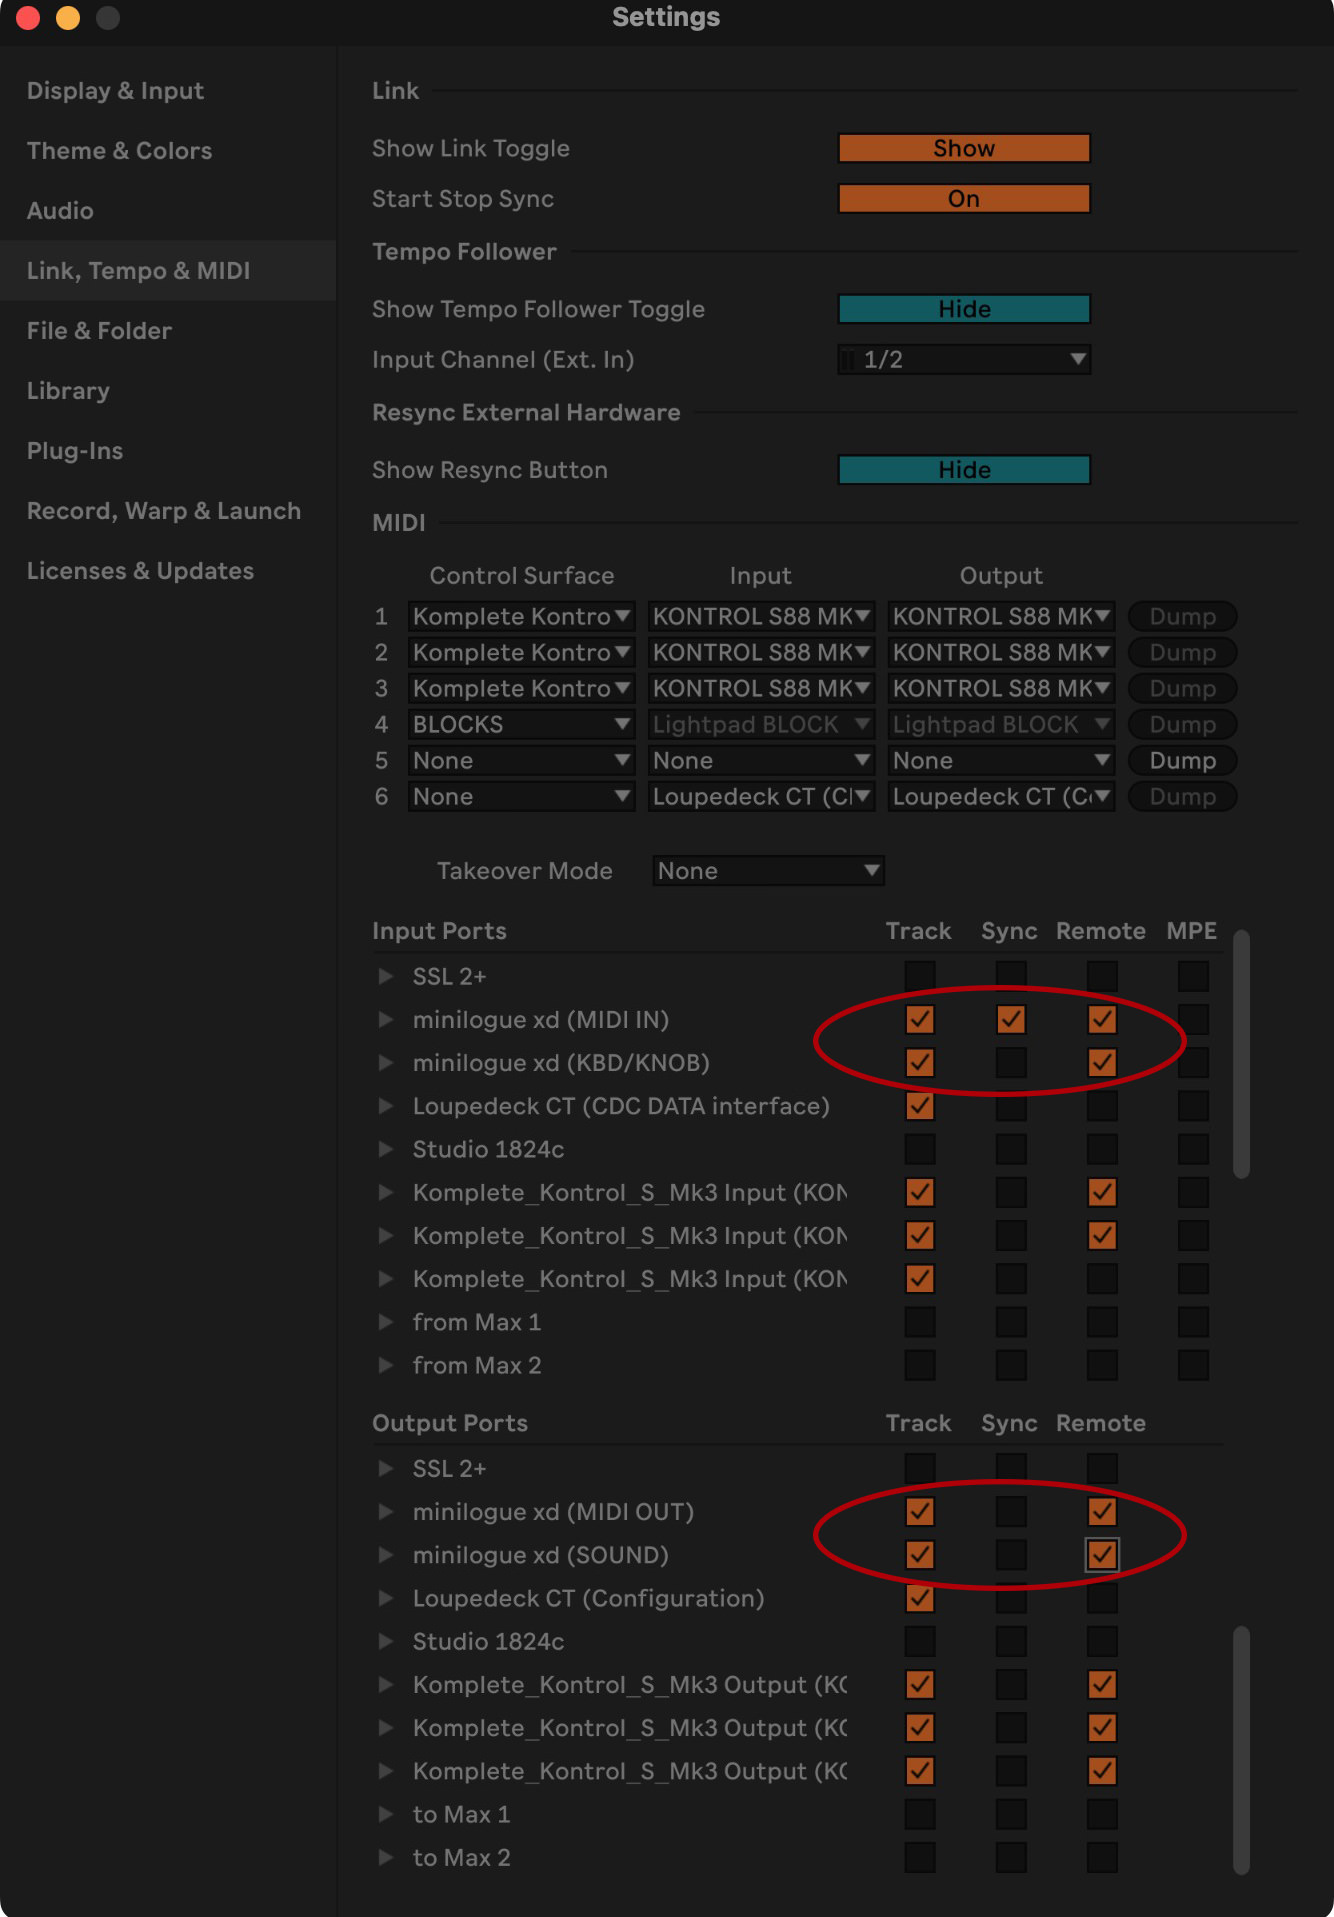
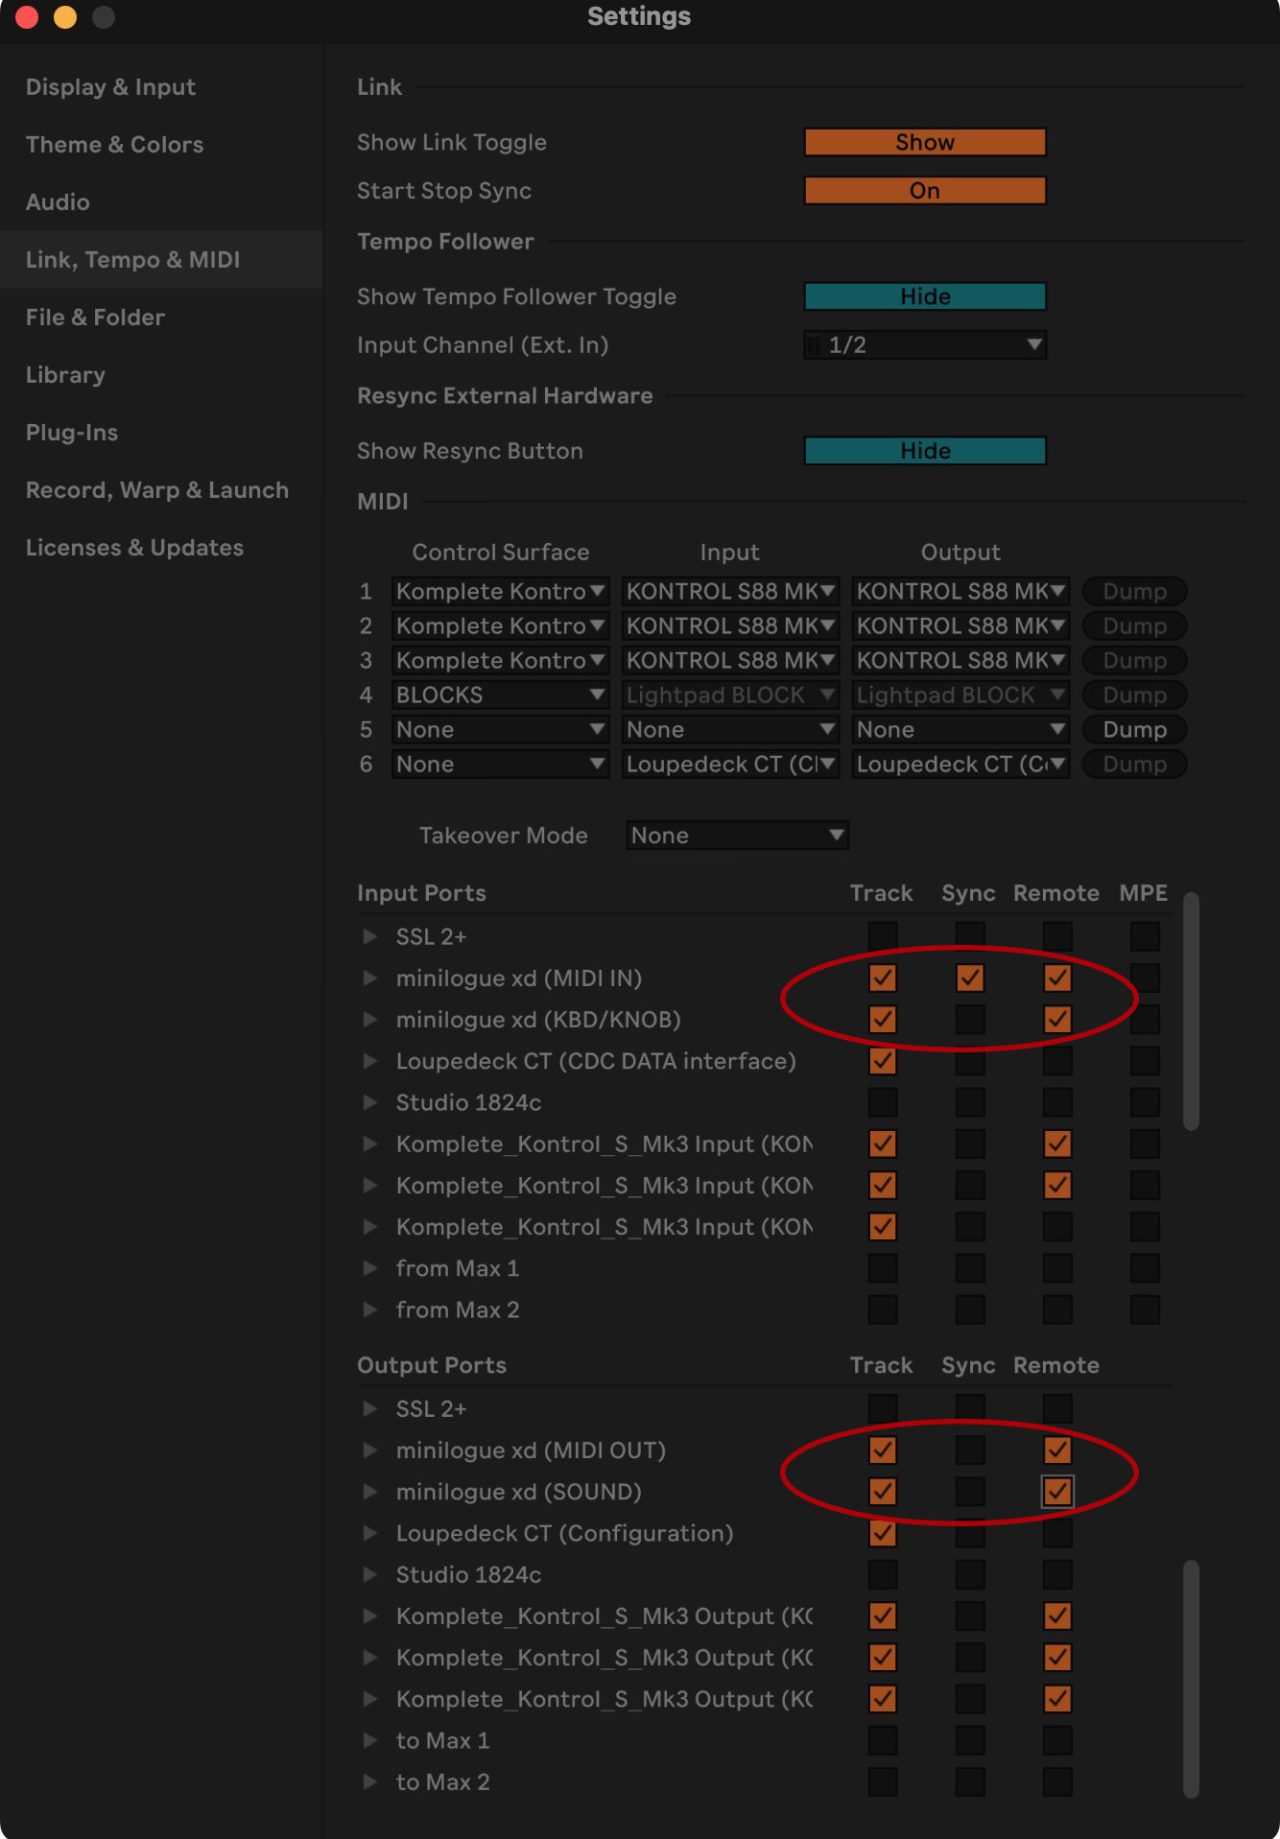
In the Ableton Live Settings, ensure that Track and Remote are enabled for minilogue xd MIDI IN, KBD/KNOB, MIDI OUT, and SOUND. I also generally turn on Sync for the minilogue xd (MIDI IN), as seen in this screenshot.
Check that the patch is working by turning a knob on your Minilogue XD, and you should see the same knob turn on the user interface in Ableton Live. If you don’t see this, check your settings. Also, change the Program in Ableton and check that your Minilogue XD updates accordingly. Conversely, move the Program dial on the Minilogue XD to see if it updates the settings in this plugin in Ableton.
Occasionally, the plugin fails to update after changing the Program. In this case, either click the GET button on the plugin interface OTHER section or change to a different Program then back again.
You can use the dial in the PROGRAM section to move between any of the 100 Programs in the selected Bank. If you click on a Bank button, you will move to the same Program number in the new bank. When browsing using the right and left Program buttons, you will automatically move between banks, so you can browse from Program 1 to 500 with the right and left buttons.
Manual Send Buttons
The following two settings require you to manually send your changes to the Minilogue XD device.
Program Name
To change the name of the selected Program, you can type it in using your computer keyboard by clicking on the Program name under the PROGRAM section. You can use up to 12 characters in your program name. Once you’ve changed the Program name, press the SEND button below the name field to send your changes to the Minilogue XD. To permanently save your change, press the WRITE button on the Minilogue XD, select a Program number to save your updated Program, and press WRITE again.
MIDI After Touch Assign
You can change the effect applied when your keyboard sends After Touch signals to the Minilogue XD by selecting an effect under the AFTER TOUCH pulldown in the EXTERNAL CONTROL section of the plugin. To send this change to the device, press the SEND button, and as with the Program name, if you want to save your change permanently, press the WRITE button on the Minilogue XD, select a Program number to save your updated Program, and press WRITE again.

Ableton Live will save Your After Touch effect selection if you save your Set and recall it like any other dial setting change. However, all these settings will be lost when you change the Program unless you write your changes to the Minilogue XD with the earlier procedure.
PolyChain Mode
As far as I can tell from my testing if you are Polychaining two Minilogue XDs for eight-finger polyphony, there is nothing additional to do in Ableton Live or this patch. Just enable Polychaining on the Minilogue XDs. It will work as expected through this Ableton Live Interface.
Plugin User Interface
For a user familiar with the KORG Minilogue XD the interface should be relatively self-explanatory. Each section from left to right is loosely organized in the same order and grouping as the buttons on the Minilogue, with the following exceptions.
We start on the far left with an untitled group to access the Pitch Bend and Joystick settings. I have to be honest and tell you that although I can’t find any bugs, I have yet to figure out how to map the joystick to any external device knobs, such as a Mod Wheel on a MIDI keyboard, or an Expression Pedal attached to a MIDI keyboard. I have added a Channel pulldown for the positive and negative Joystick movement, and have confirmed via viewing MIDI output that this is working, but again, cannot see it doing anything useful. If you have any feedback about this please contact me, and I will release an update later if necessary to modify how this works.
Using the SAVE button in the PROGRAM section you can save the currently active Program in a file on your computer and reload it later with the LOAD button.
Everything from the OTHER section to the right side is dials and options only available from within the Minilogue XD menus, and a few additional features that are only available in this plugin, like a SOUND OFF button to stop any MIDI signals that run away with themselves, or a RANDOMIZE button to randomize many of the useful parameters of the Minilogue XD.
Version 1.3 Changes (Oct, 2024)
In version 1.3 we made logic changes to make the synchronization of dial adjustents smoother between the plugin interface and your Minilogue XD device.
We also added a Pitch Bend slider to the far left of the plugin interface, which can be used to bend the pitch on your Minilogue XD with your mouse. Adjustments made with your mouse can be recorded and will be reflected in the interface during playback of MIDI recordings. There is a switch to turn on the handle glide back to the middle of the slider when you release the mouse, and you can select the time that the glide will take, from 50 ms to 10 seconds, according to your creative purposes.
There is now an All MIDI button under the PROGRAM section which enables an experimental feature, which attempts to listen to more MIDI devices, which may help you to connect your Minilogue XD if it is not named by the conventions used in this getting started guide. If this doesn’t help, or causes problems, please let us know.
Version 1.22 Changes (July 2024)
Modified the specified colors for the Mute and Solo buttons so that they match the colors in the selected Ableton Live theme and removed the complimentary Dark Teal theme. Ableton Live now has some great looking dark themes, so we will no longer include the Dark Teal theme with this plugin. There were no other functional changes in this release.
Version 1.21 Changes (Dec 2023)
In version 1.21 we fixed an issue that caused the selected Delay Sub Type to creep up the list when hitting the BIND button. It should now stay put.
Version 1.2 Changes
In version 1.2 we made things a little more bullet-proof. You should now see better saving of tracks, and better synching with your Minilogue XD when hitting the Bind button after switching between multiple tracks using this plugin. There is also now a red warning displayed over the PROGRAM section when you do not have an External Instrument installed on the same track as our Minilogue XD plugin.
Version 1.1 Changes
From Version 1.1 you can now use multiple instances of the plugin in Ableton Live. Of course, there is only one device connected, so the selected track will attempt to connect to your Minilogue XD, but as there is no way to disconnect the old track after moving to a different track, there is now a BIND button in the PROGRAM section, allowing you to take control of the device and link all of the dials and controls in the plugin to your physical device. The selected Program number is stored in each track, so unless you open and save the plugin using the Max for Live editor, you can always get back to the track used on that track by pressing the BIND button.
You’ll also notice a new Mute, Solo, and Arm button in the PROGRAM section, enabling the control of these buttons on the current Ableton Live track.
We also updated the Program number, so you can click and drag up and down to increase or decrease the program number. The five bank buttons still jump through each bank to the same program number, but one hundred programs up or down, but dragging the Program number now gives instant access to all 500 programs stored on your Minilogue XD.
We also added a workaround for a problem that caused the LFO INT dial to display incorrect numbers in the plugin. The selected setting number should now be the same as displayed on the Minilogue XD most of the time. Occasionally you may see a small discrepancy.
Note too that there were some minor tweaks to the Dark Teal Theme in this update, so if you are using the theme, please copy the latest version to your Themes folder once again. See Installing the Dark Teal Theme below.
IMPORTANT: The link that you receive from Paddle when purchasing the plugin does not expire. If you have any problems with the plugin, please click on the question mark to the right of the logo in the bottom left corner of the interface and check the version number. If you do not have the latest version, please use the download link from your purchase email to download the plugin again. If you cannot find your purchase email, please contact us.
Issues?
Please note that this plugin has been tested on Ableton Live 11 on Mac OS, both Intel and M1. Generally, it comes with no promises or support commitments, but if you are having problems, please contact us. We’ll do our best to make any necessary changes in a reasonable time.
Disclaimer
Martin Bailey Photography K.K. is in no way affiliated with Korg Inc. although their head office is only a 15-minute walk from ours. 🙂


